Raspberry Pi
Divers installations et essais sur Raspberry Pi.
- Installer Raspberry Pi OS sur un Raspberry Pi
- Installation de Pi-Hole sur RpiZeroW
- CentOS 8 minimal installation on RPi 3+ 🇬🇧
- Self host your web meetings with Jitsi and Raspberry Pi
Installer Raspberry Pi OS sur un Raspberry Pi
Installion de Raspberry Pi Imager sur l'ordinateur
Se rendre sur le site officiel de Raspberry Pi www.raspberrypi.org à la page des programmes.
Télécharger le programme correspondant à la version de son système d'exploitation (ici Windows).
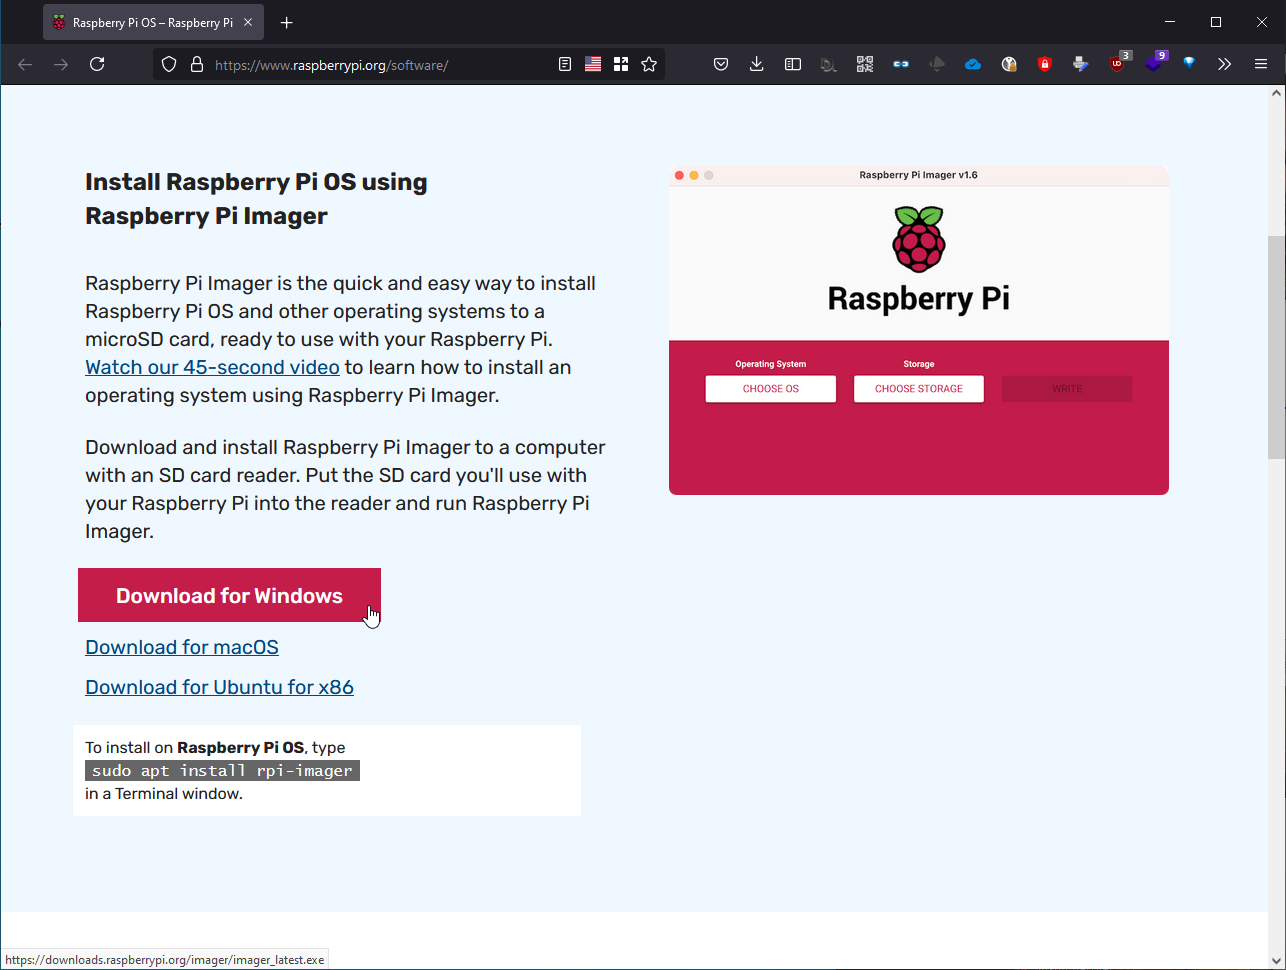
On lance le programme d'installation.

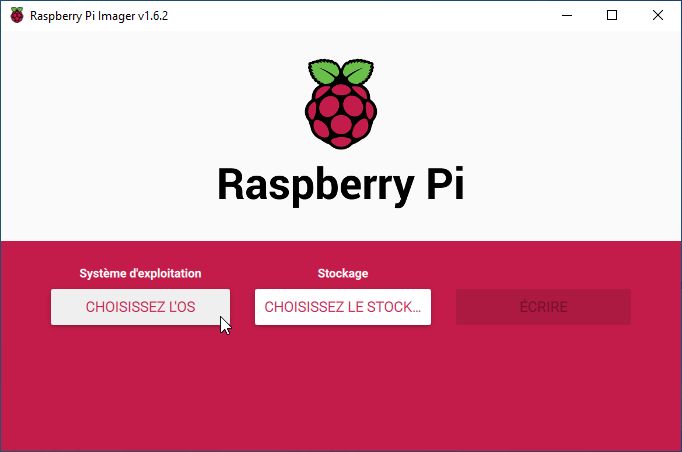
Utilisation de Raspberry Pi Imager
Raspberry Pi Imager se résume à trois actions / boutons :
- Choisissez l'OS → choisir le système d'exploitation
- Choisissez le stockage → choisir la carte µSD qui recevra le système d'exploitation
- Écrire → écrit le système d'exploitation sur la carte µSD
Le but étant d'avoir une application simple de base.
Cependant, des options avancés sont « cachées », pour les faire apparâitre : ctrl+maj+x (⌘+⇧+x sous MacOS) depuis la page d'accueil.
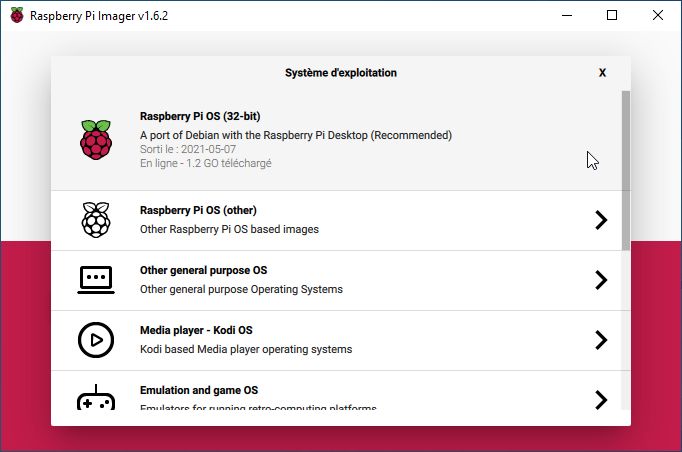
Systèmes d'exploitation (OS)
Depuis la page d'accueil de l'application, le premier bouton permet de choisir l'OS à installer sur la carte µSD.
Le premier OS présenté est celui qui est recommandé. Il s'agit du portage de Debian sur le RPi en version 32-bit.
Cette version dispose d'un environnement de bureau complet (barre des tâches, fenêtres, etc.).
Bien que le RPi 3 B, RPi 3 B+, le RPi 4 B et le RPi 400 disposent d'un processeur 64-bit, Raspberry Pi OS n'est à ce jour disponible qu'en 32-bit.
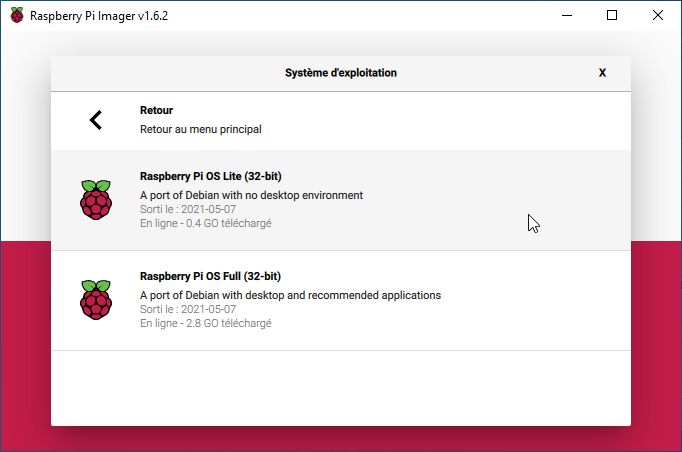
La seconde ligne présente deux autres déclinaisons de Raspberry Pi OS.
- Raspberry Pi OS Lite est le portage de Debian sans environnement de bureau (tout se passe en ligne de commande), idéal pour un serveur. Il est également possible d'installer un autre environnement de bureau par la suite.
- Raspberry Pi OS Full est le portage de Debian avec environnement de bureau ainsi qu'une multitude d'applications recommandées (LibreOffice, Sratch, etc.).
Les lignes suivantes de systèmes d'exploitation représente différentes familles d'OS suivant des usages différents :
- Autres systèmes d'exploitations (Manjaro, Ubuntu, RISC OS PI) ;
- Lecteur multimédia ;
- Émulateur de jeux ;
- Etc.
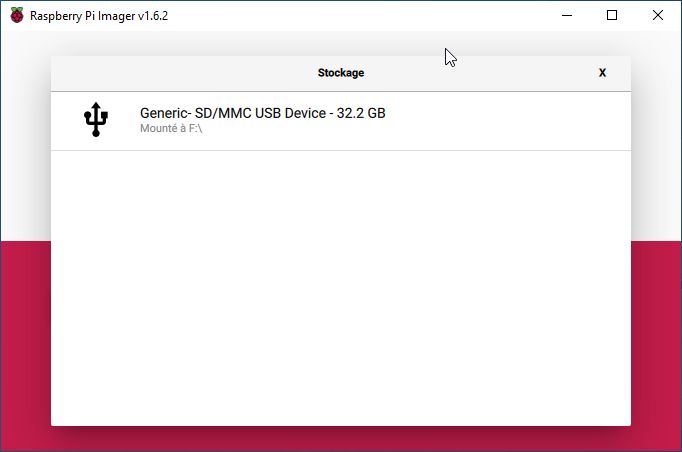
Choix du stockage
Depuis la page d'accueil de l'application, le deuxième bouton permet de choisir l'emplacement de la carte µSD.
Pour ce faire, il faut q'une carte µSD soit insérée dans l'ordinateur (soit directement, soit dans un adaptateur µSD → SD, soit un lecteur USB, etc.).
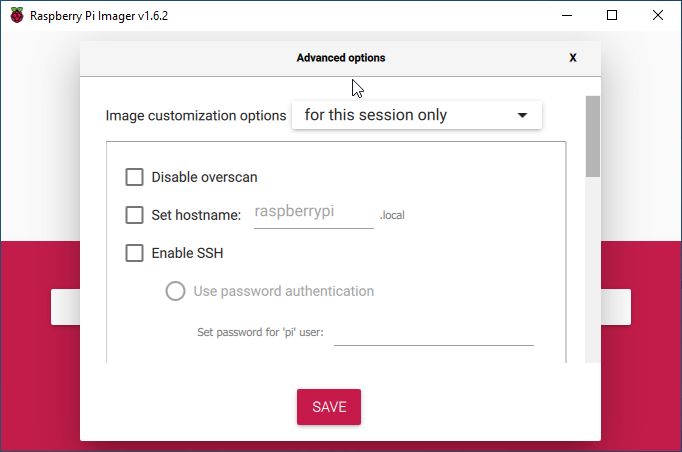
Options avancées « cachées »
Rappel : Les options avancés sont « cachées », pour les faire apparâitre : ctrl+maj+x (⌘+⇧+x sous MacOS) depuis la page d'accueil.
Ces options peuvent être paramètrées autrement, que ça soit avant, pendant ou après le premier démarrage.
La premier option est une liste déroulante. Elle permet de choisir si les options que l'on va choisir sont uniquement pour cette session ou si elles doivent demeurer pour les installations futures.
- « Disable overscan » : dans une installation normale, lors du premier démarrage du RPi, l'OS va s'étendre sur toute la capacité de la carte µSD, cette option permet de désactiver cette action. Si cette option est cochée, une partie de la carte µSD ne sera pas exploitable.
- « Set hostname » : permet de nommer l'appareil lorsqu'il sera connecté au réseau local. Par défaut, il sera nommé
raspberrypi.local. - « Enable SSH » : permet d'activer le serveur SSH sur le RPi.
- « Use password authentification » : utilise un mot de passe pour la connexion SSH ;
- « Allow public-key authentication only » : utilise une clés PGP/GPG public pour la connexion SSH.
- « Configue wifi » : permet de paramètrer le wifi.
- « SSID » : identiant du réseau wifi ;
- « Password » : mot de passe associé au réseau wifi ;
- « Wifi country » : pays dans lequel se situe ce réseau wifi.
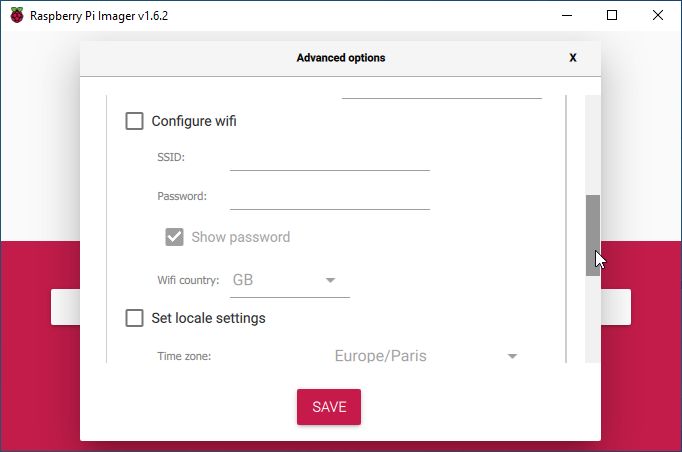
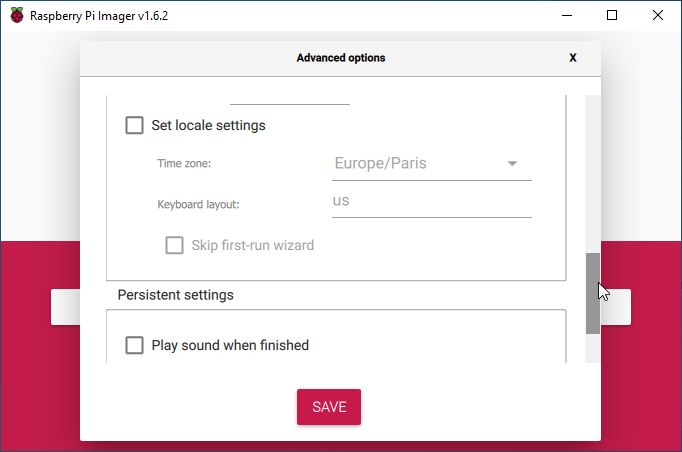
- « Set locale settings » : permet de personnaliser les paramètres locaux.
- « Time Zone » : permet de choisir le duo continent/ville du fuseau horaire ;
- « Keyboard layout » : permet de choisir la disposition du clavier ;
- « Skip first-run wizard » : permet de passer l'assistant de configuration des paramètres locaux lors du premier lancement.
- « Persistent settings » : paramètres persistants.
- « Play sound when finished » : l'application jouera un son (notification) lorsque l'écriture sur la carte µSD sera terminée ;
- « Eject media when finished » : l'explorateur de fichier éjectera la carte µSD lorsque l'écriture sera terminée ;
- « Enable telemetry » : autorise l'application à envoyer des données aux mainteneurs du projet afin d'établir des statistiques.
Écrire l'OS sur la carte µSD
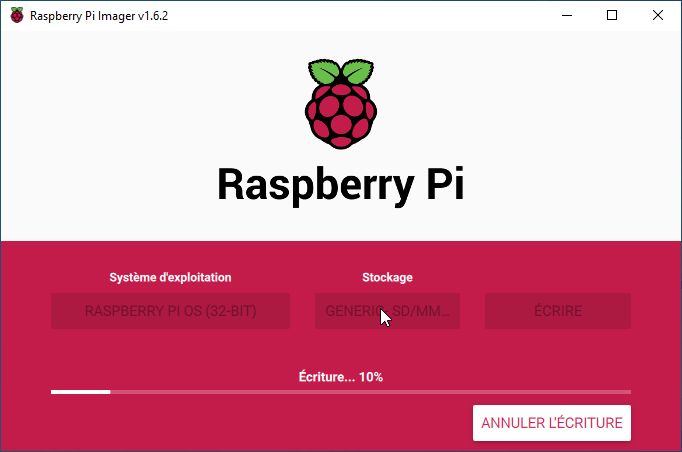
Depuis la page d'accueil de l'application, le troisième bouton permet de lancer l'écriture de l'OS sur la carte µSD.
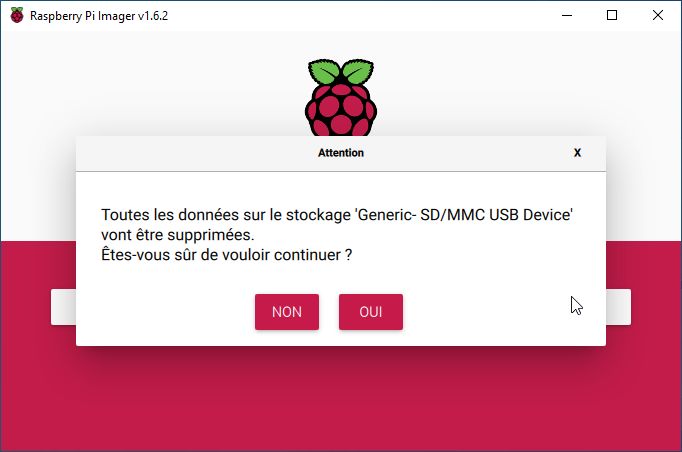
Lorsque l'on clique sur le bouton « ÉCRIRE » une fenêtre demande la confirmation d'écraser les données de la carte µSD.
D'abord l'application écrit les données sur la carte µSD.
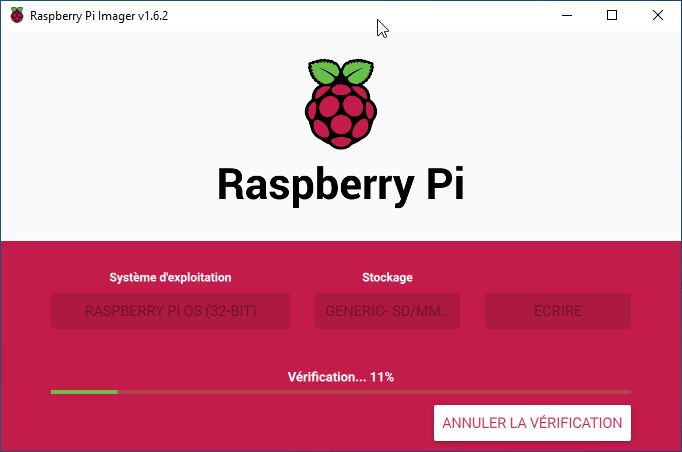
Ensuite l'application vérifie les données écrites sur la carte µSD.
Puis l'application invite à retirer la carte µSD du lecteur.

Raspberry Pi OS - Premier lancement
Chargement de Raspberry Pi OS
Lors du démmarrage du RPi, un carré multicolor s'affiche.

Une fenêtre de bienvenue s'affiche présentant la version installée.
Note : l'icône en forme d'éclair indique que l'alimentation est inférieure aux recommandations du modèle de RPi.

Réglages de configuration
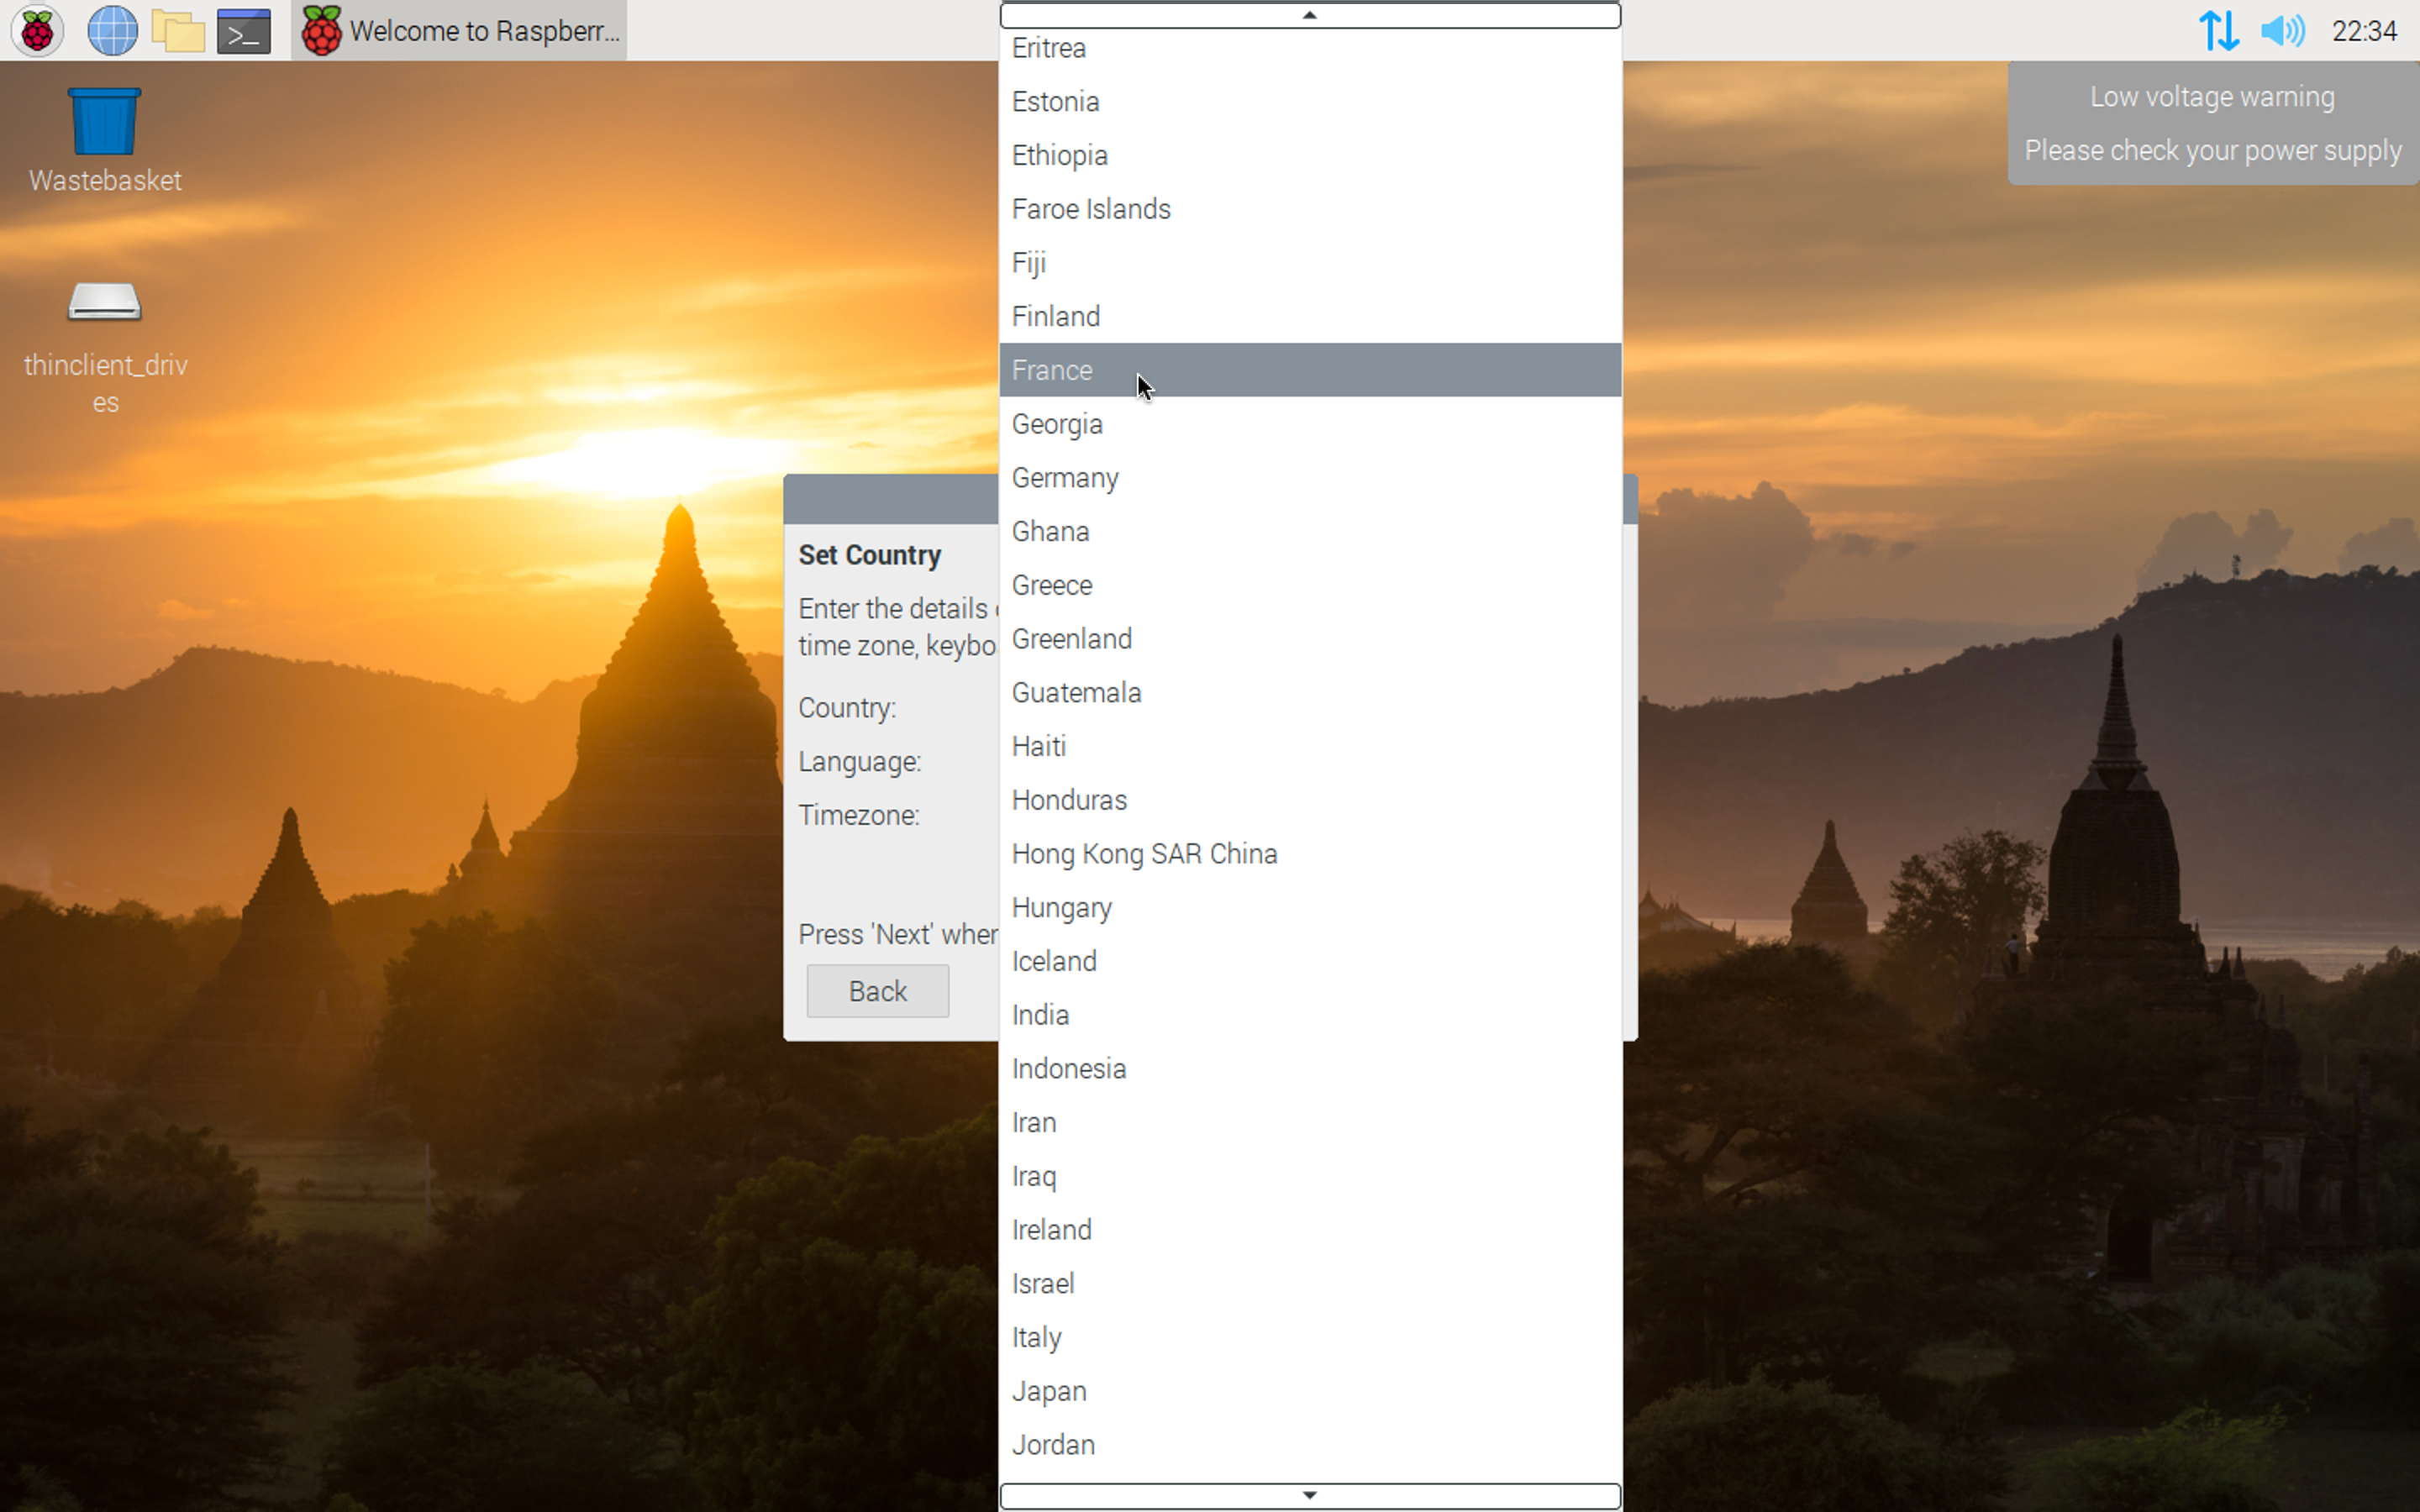
L'environnement de bureau s'affiche avec une fenêtre ouvrant sur différents réglages de configuration.

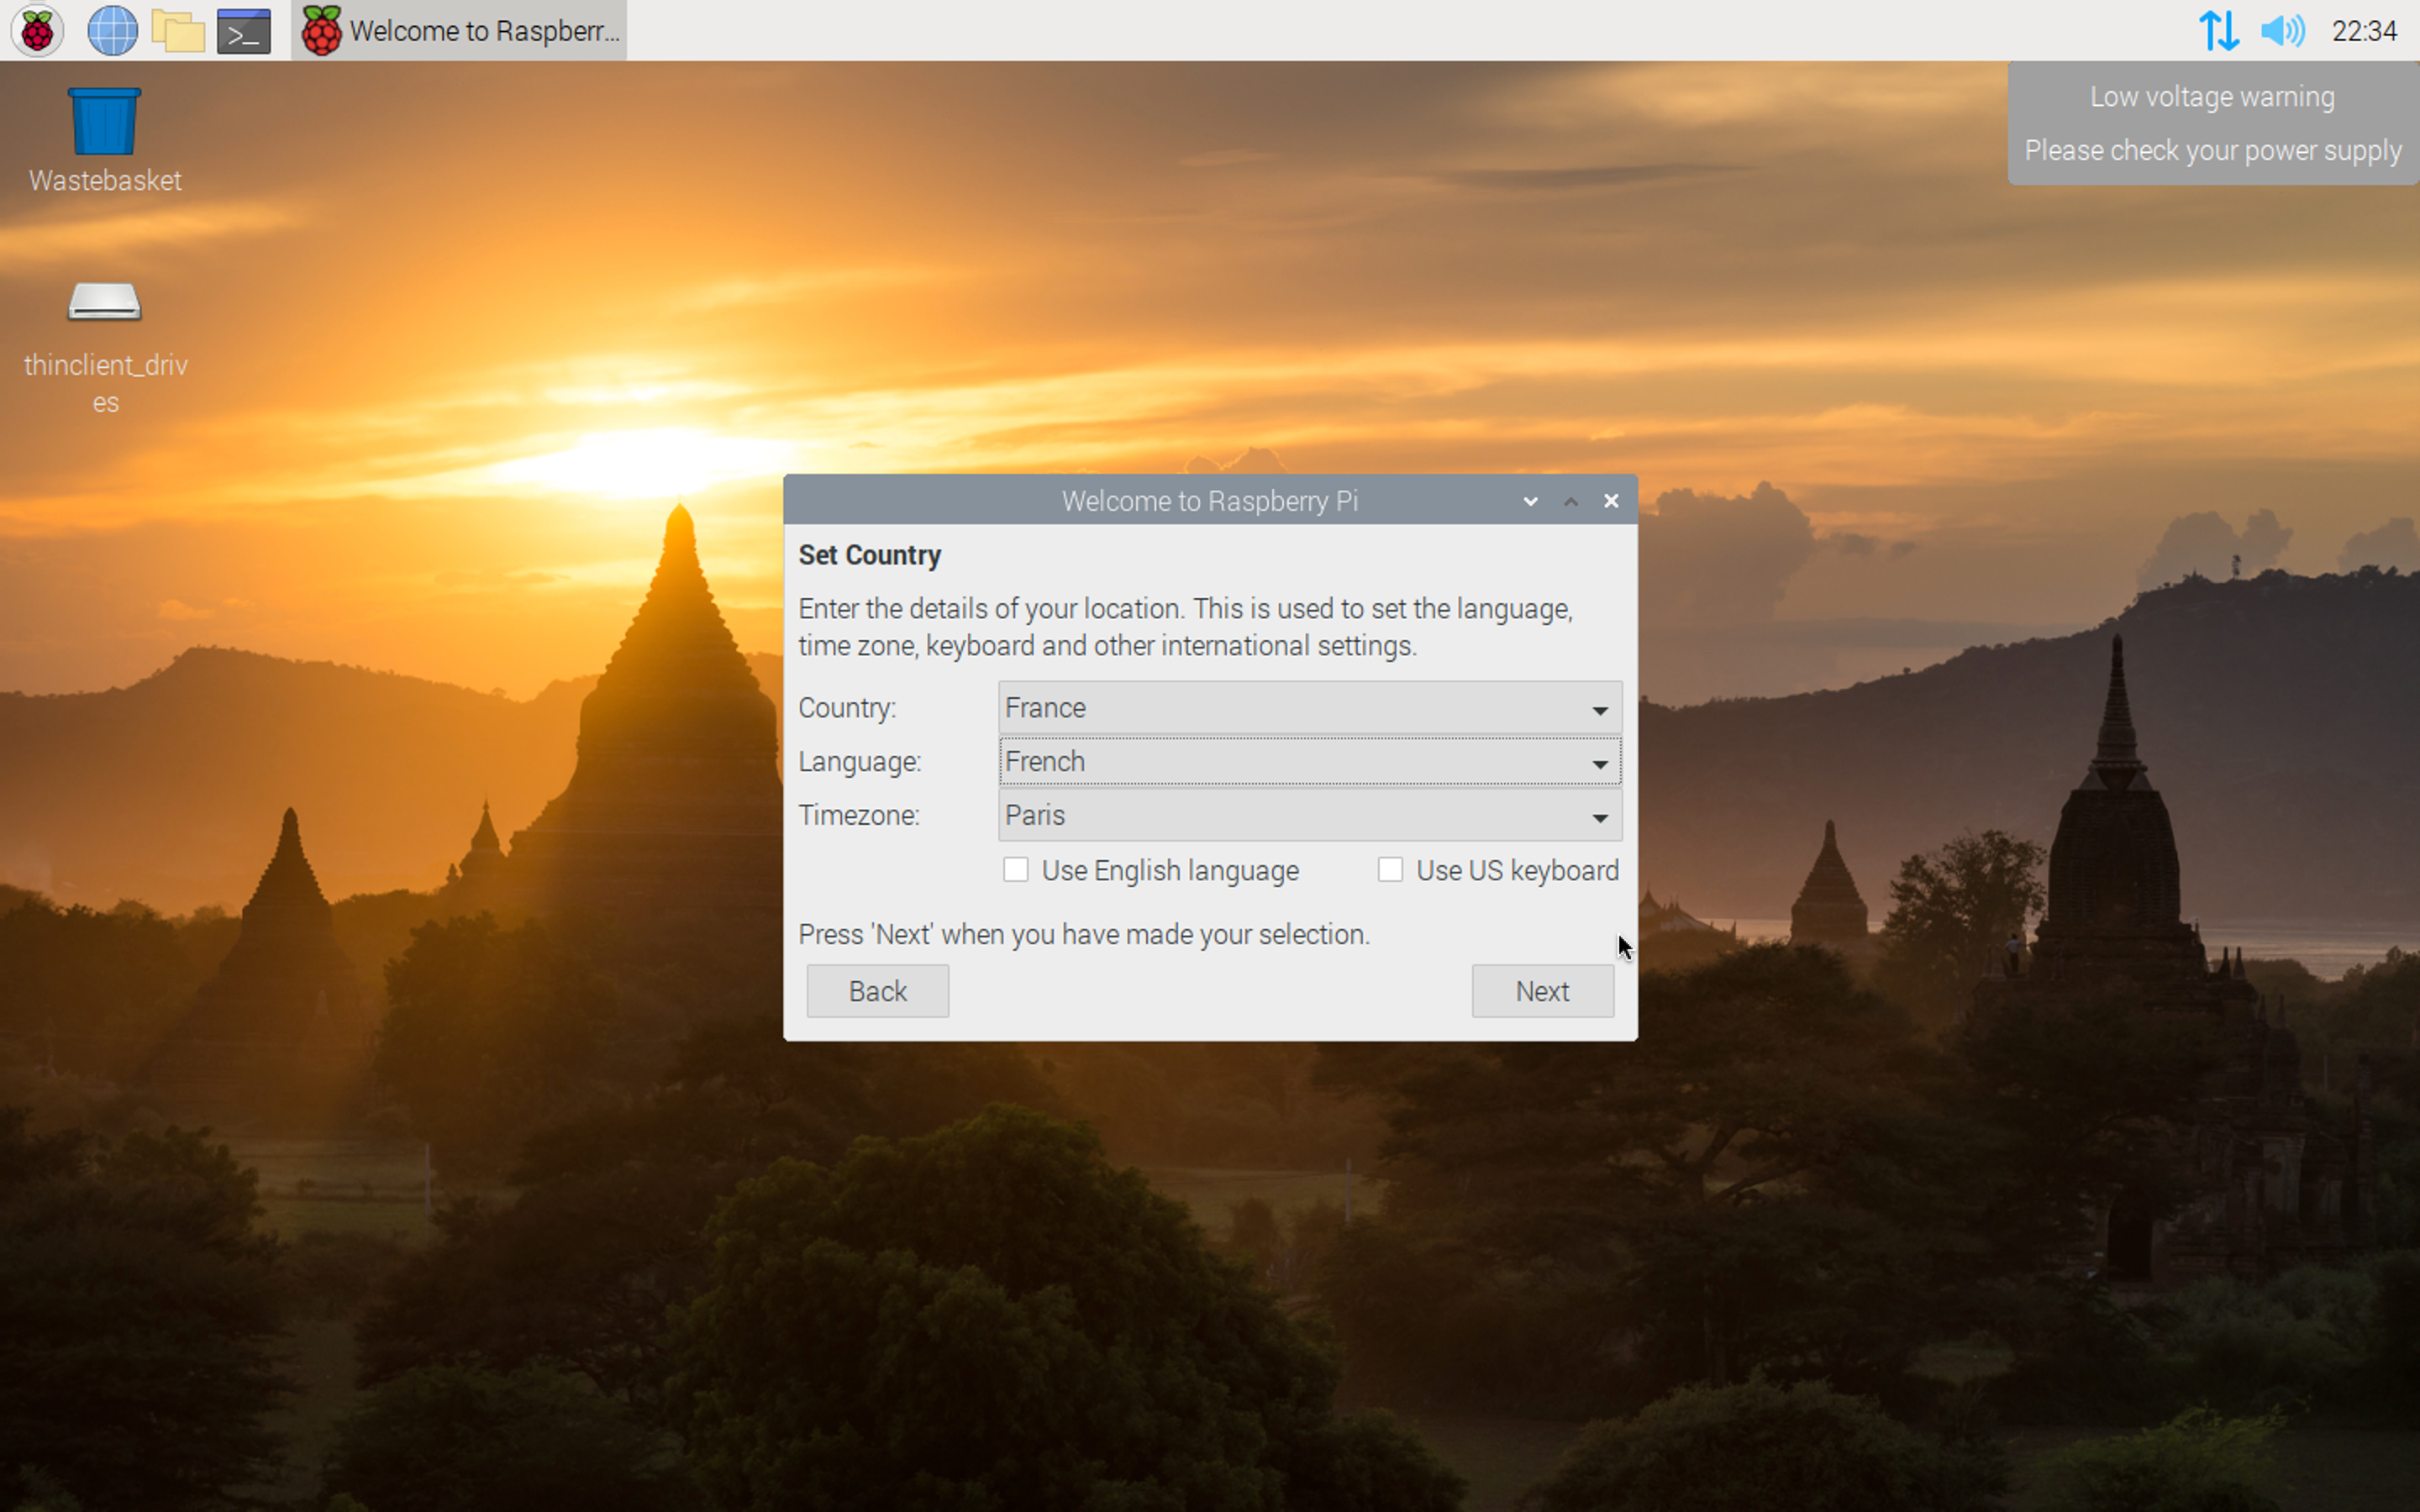
Si le réglage n'a pas été effectué dans les options avancées « cachées », il est possible de régler les paramètres locaux.

La sélection du pays se fait depuis une liste déroulante, cette option permet principalement de gérer la disposition du clavier, mais aussi la langue du système.
L'option Timezone permet de régler le fuseau horaire, donc l'heure d'affichage du système.
Note : Le RPi a besoin d'une connexion Internet pour se mettre à l'heure, il ne dispose pas d'horloge interne.
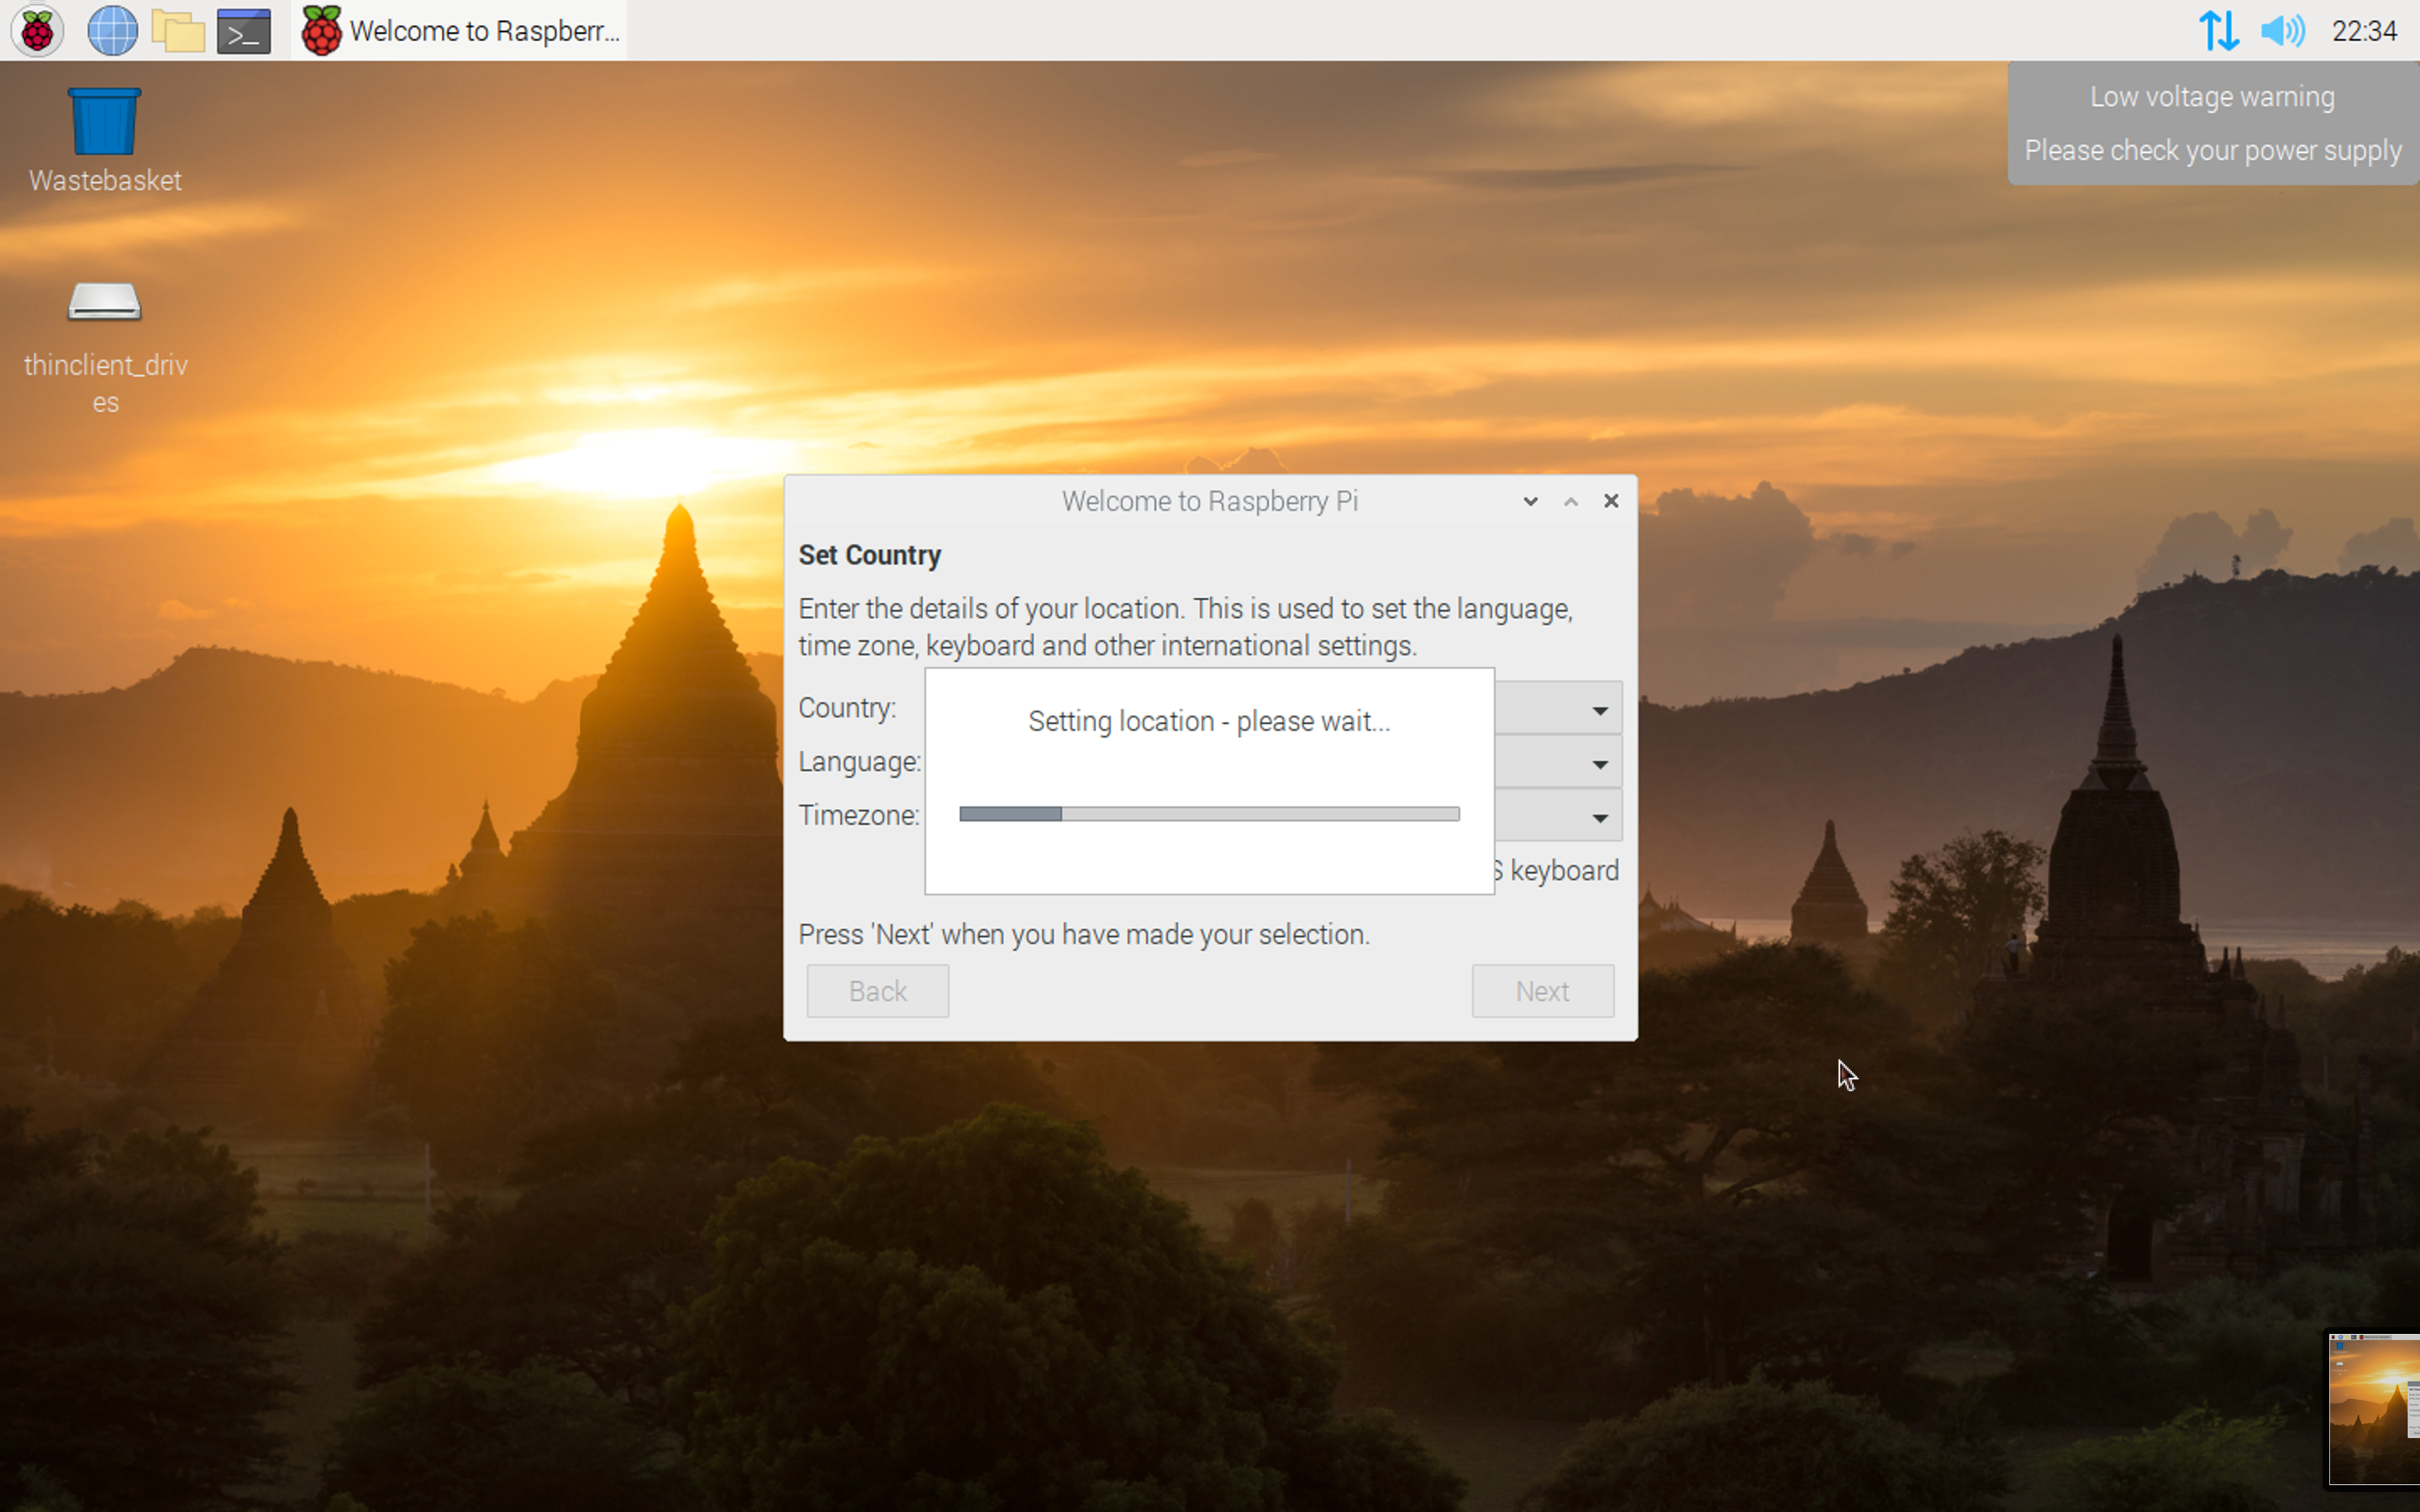
Le système prend en compte les réglages de localisation.
Il est important de changer le mot de passe par défaut (« raspberry ») de l'utilisateur par défaut, à savoir « pi ».
Ne pas oublier le mot de passe, il ne sera pas possible de le récupérer.

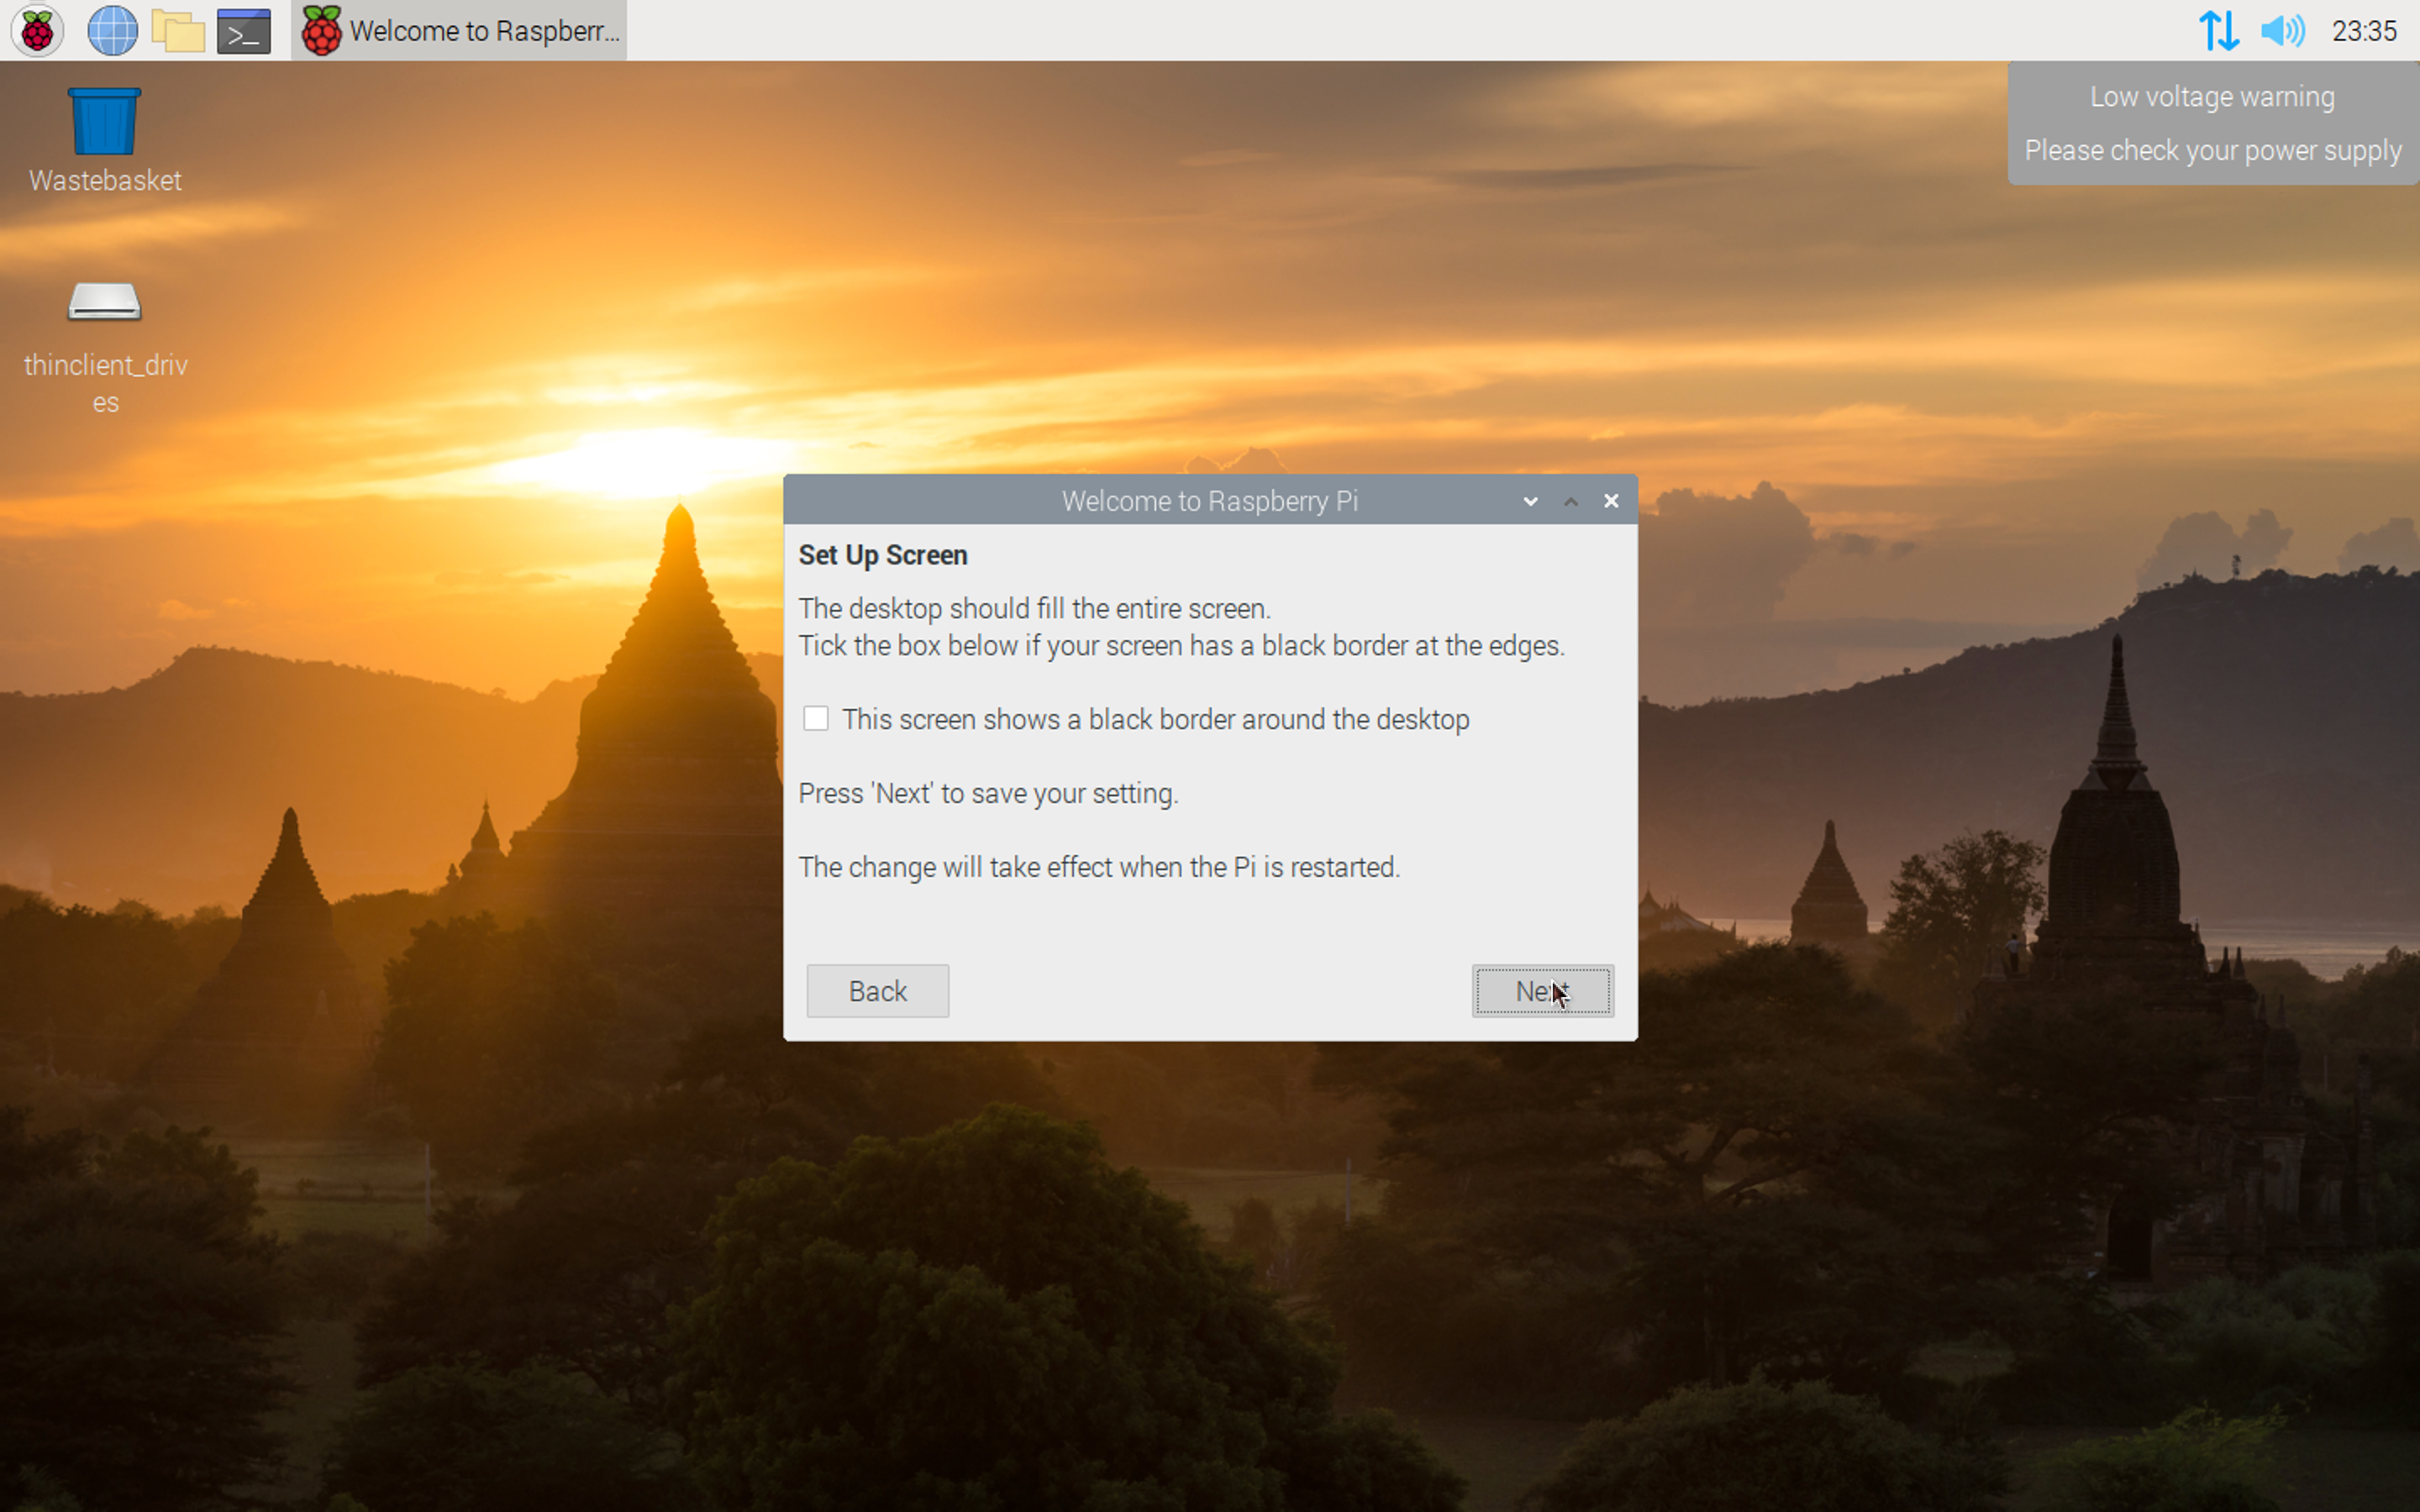
L'affichage doit occuper tout l'écran, si ce n'est pas le cas, il est possible de le recalibrer.
RPi OS a découvert un réseau Wifi, il demande la confirmation de connexion. Le nom affiché représente le SSID.

Pour finaliser la connexion Wifi, il est nécessaire d'entrer le mot de passe.

Le RPi va vérifier la présence de mises à jour. Cet étape est importante, elles concernent souvent la sécurité de l'OS.
Il est donc préférable de cliquer sur le bouton « Next ».

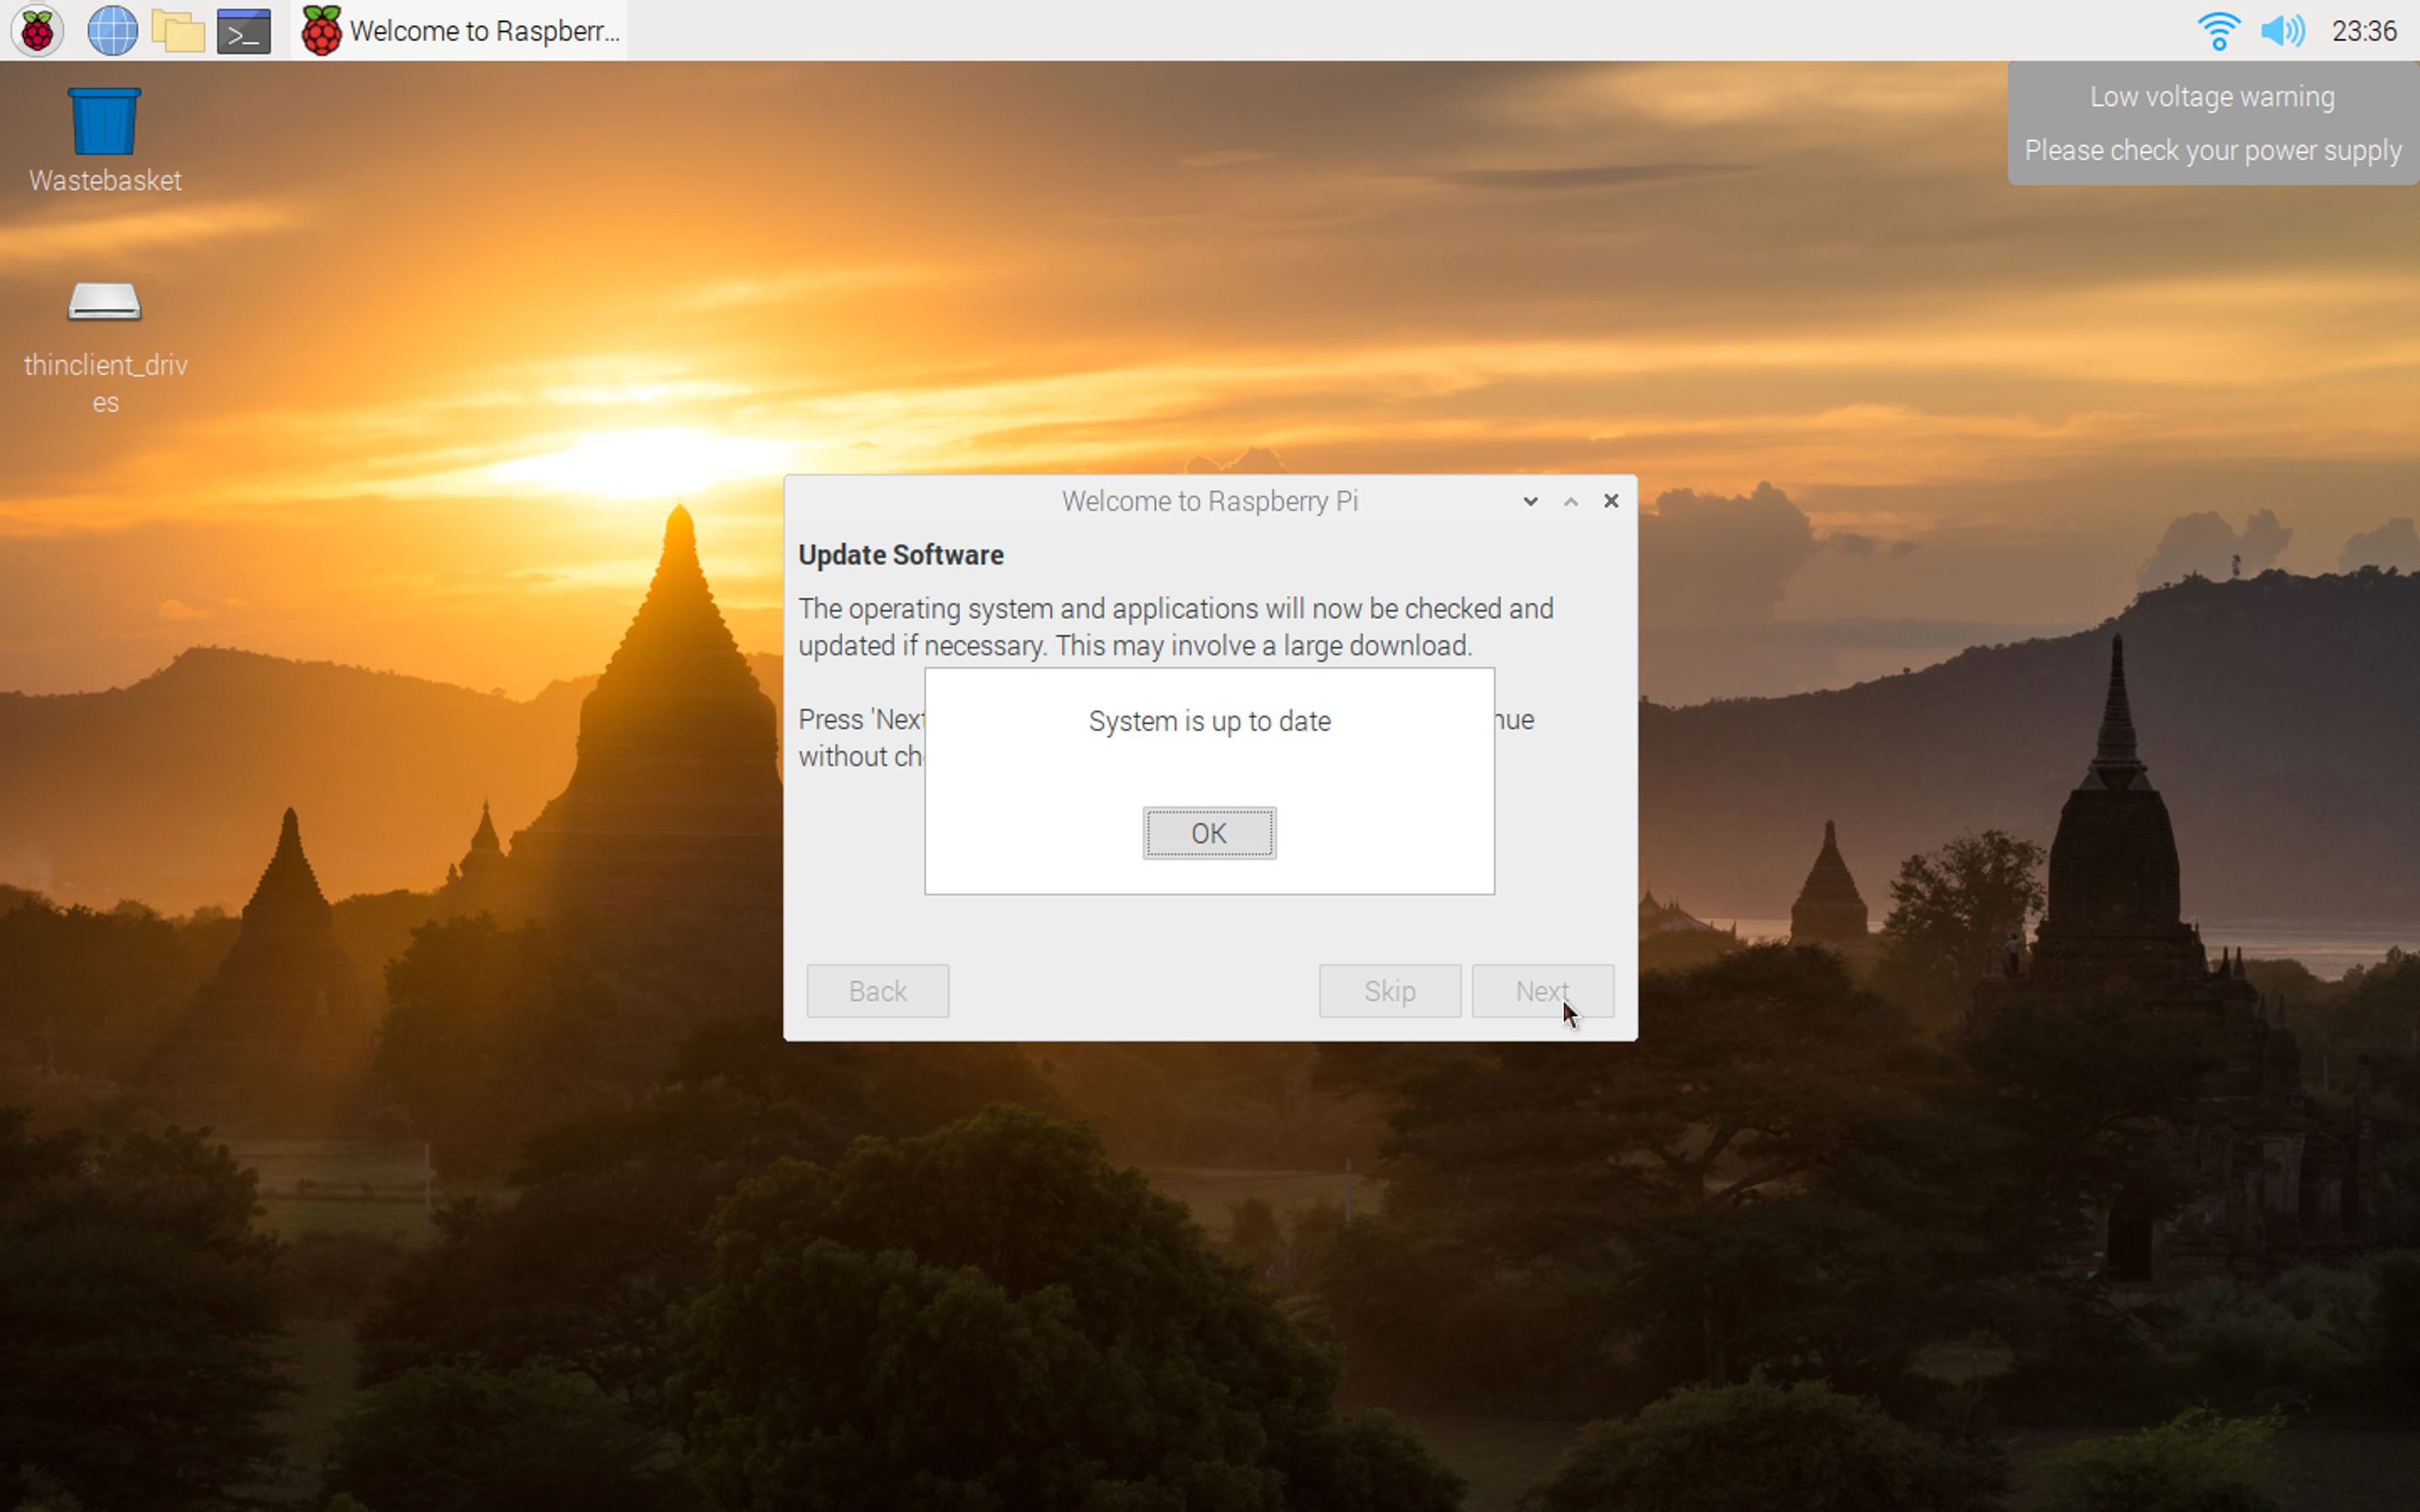
L'OS recherche la présence de mises à jour et les installent dans la foulée si nécessaire.
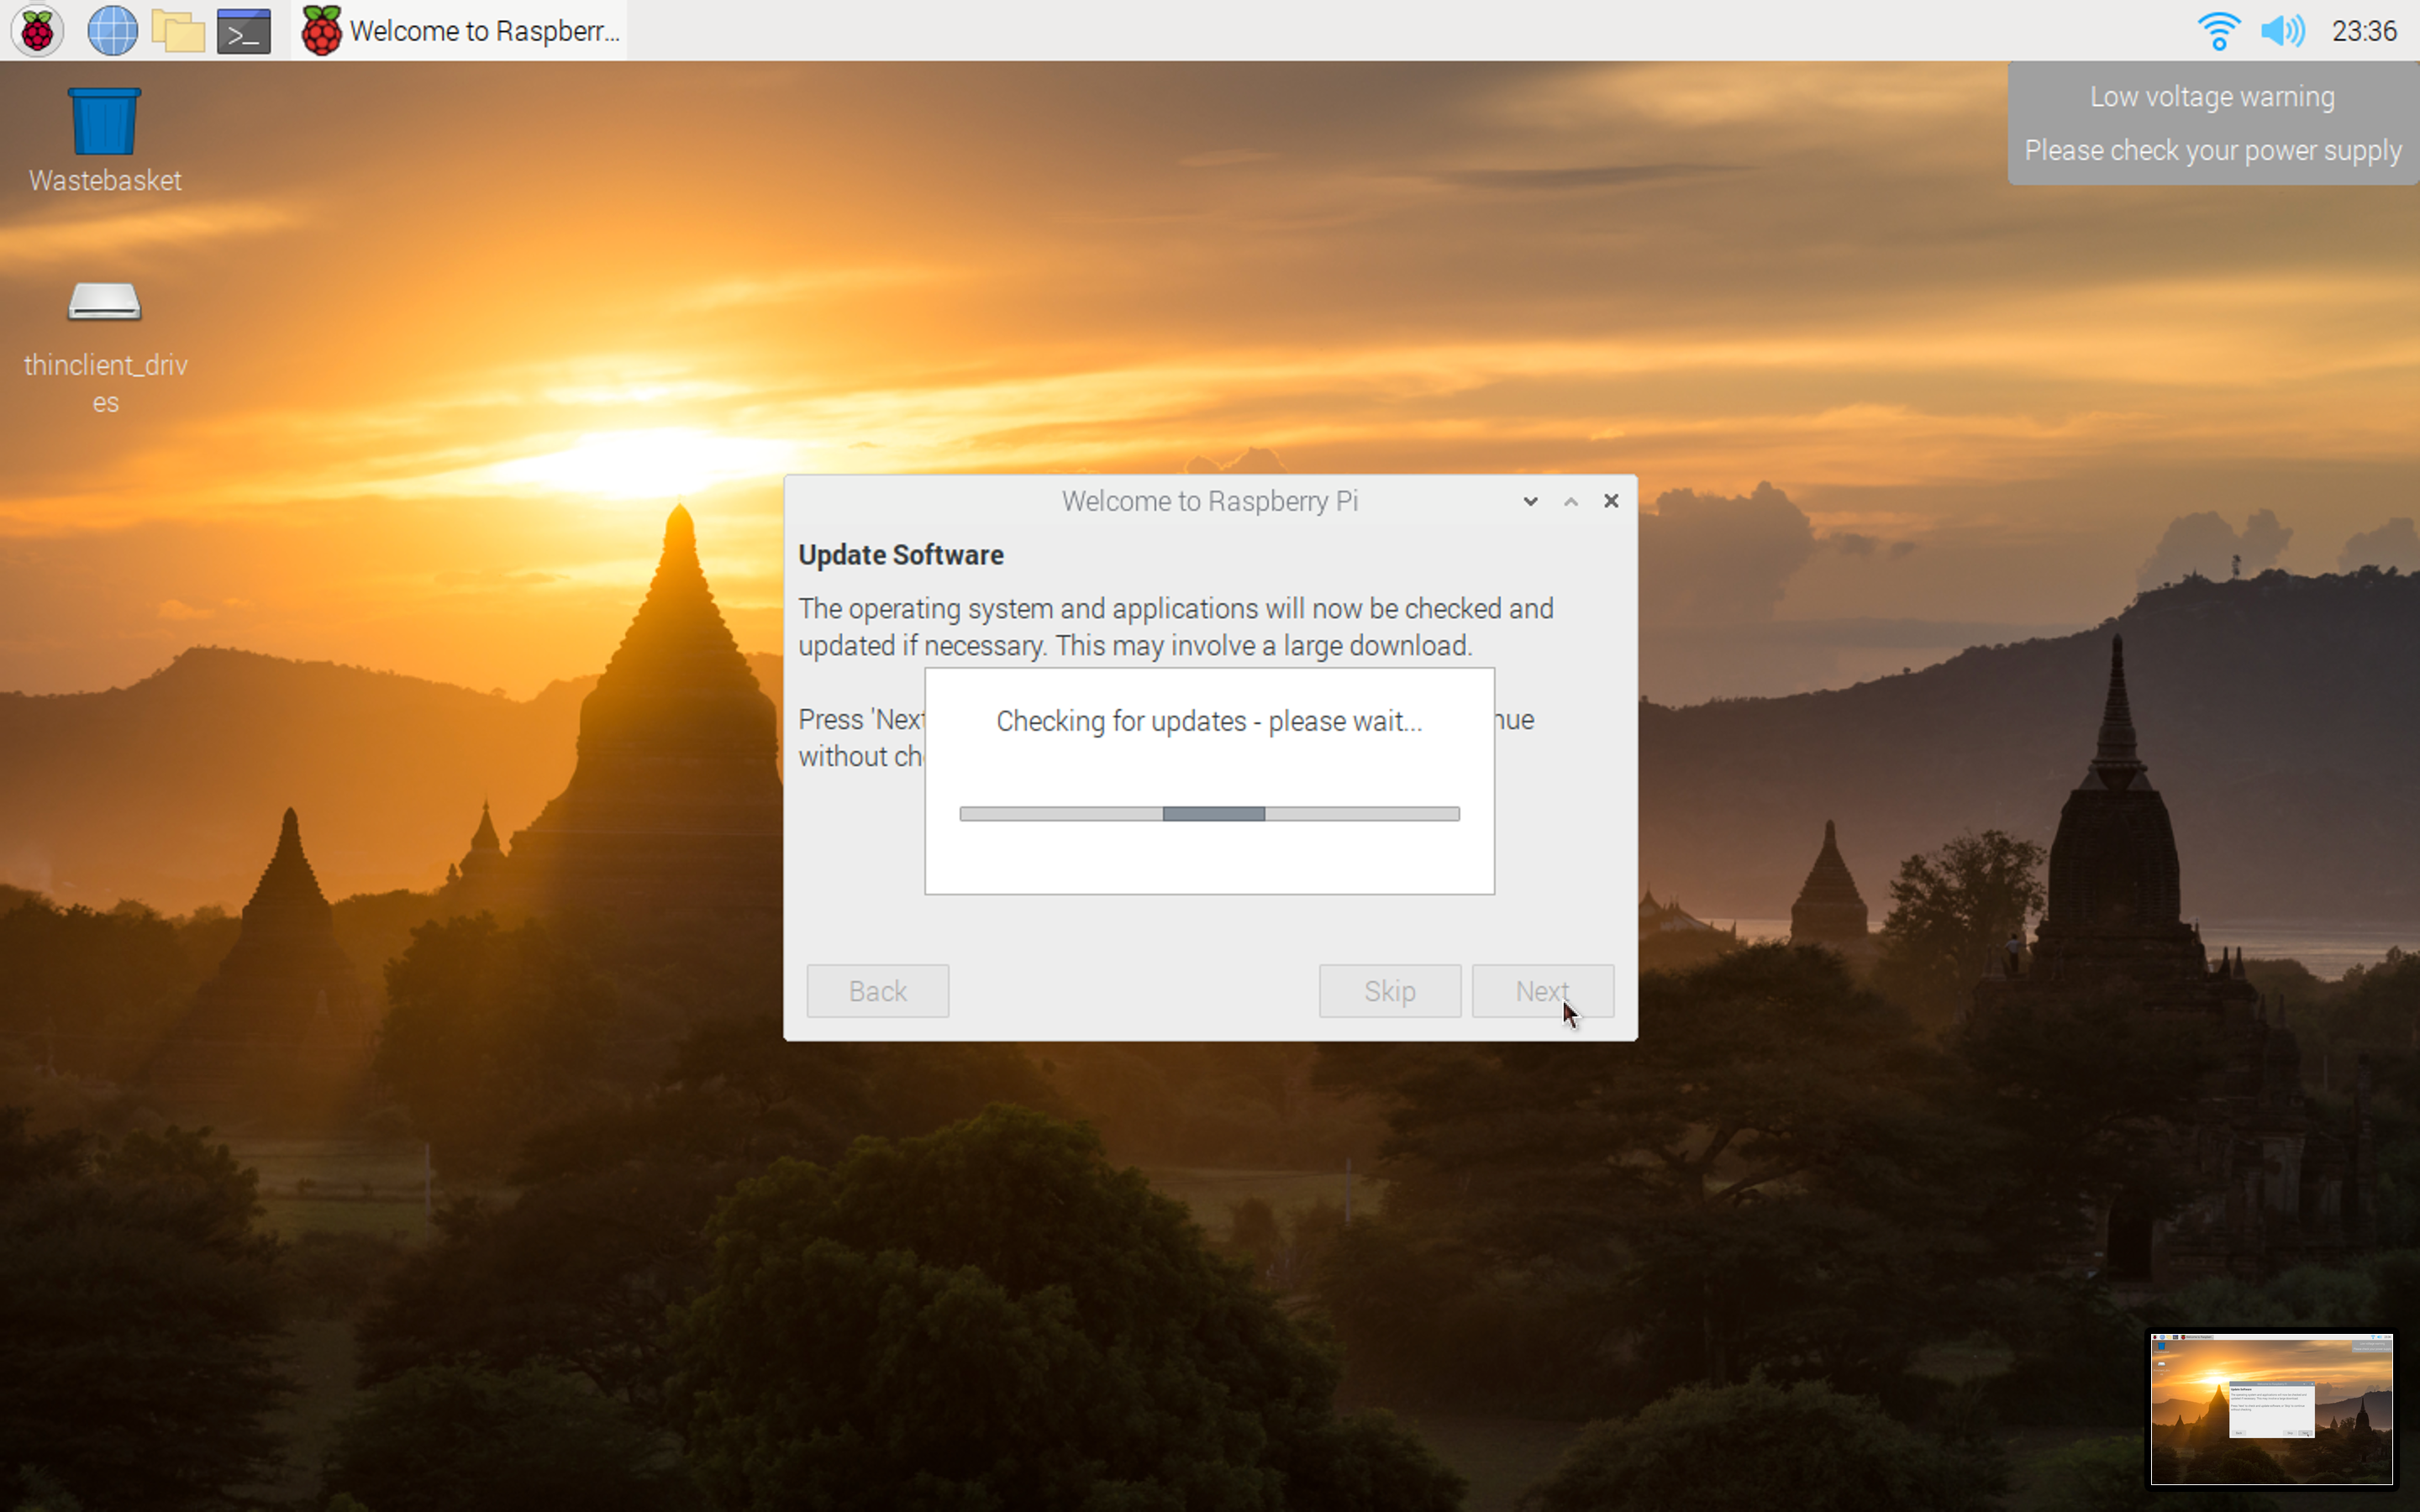
Lorsque l'opération de mise à jour est terminée, il indique que le système est à jour.
Redémarrage
Après un redémarrage, le système est à jour et en français.

Divers sources
Making Society | Raspberry Pi tout savoir pour bien débuter.
Installation de Pi-Hole sur RpiZeroW
Procédure accélérée de l'installation de Pi-Hole sur un Raspberry-Pi Zero W.
Installation de Raspberry Pi OS Lite
Téléchargement de l'OS
Installer l'image Raspberry Pi OS Lite sur le RPi0W.
Lien des images sur le site.
Préparation accès SSH du RPi0W
Éditer ou créer le fichier BOOT/wpa_supplicant.conf (soit à la racine de la carte).
country=FR
ctrl_interface=DIR=/var/run/wpa_supplicant GROUP=netdev
update_config=1
network={
ssid="<yourWiFiNetworkName>"
psk="<yourWiFiPassword>"
}
Également à la racine, créer un fichier vide ssh :
touch ssh
Accès SSH & MàJ
Se connecter en ssh au Rpi (mot de passe par défaut raspberry):
ssh pi@raspberrypi.local
>[…]
>Are you sure you want to continue connecting (yes/no/[fingerprint])? yes
>[…]
Mise à jour, c'est assez long…
sudo apt-get update && sudo apt-get upgrade -y
On change le mot de passe par défaut de pi avec la commande passwd.
J'en profite pour créer mon utilisateur, lui assigner un mot de passe et l'ajouter au groupe sudo :
sudo useradd -m <username> # -m pour créer le fichier home
sudo passwd <username>
>New password:
>Retype new password:
>passwd: password updated successfully
sudo usermod -aG sudo <username> # -a pour append, -G pour le groupe
Je change le nom de l'appareil sur le réseau :
sudo hostnamectl set-hostname pihole
sudo vim /etc/hosts # pour également changer le nom sur l'ip interne
127.0.0.1 localhost
::1 localhost ip6-localhost ip6-loopback
ff02::1 ip6-allnodes
ff02::2 ip6-allrouters
127.0.1.1 pihole # ici
sudo reboot
J'envoie ma clé publique depuis mon hôte :
ssh-copy-id -i .ssh/id_rsa.pub pihole.local
Je peux me connecter directement :
ssh pihole.local
Automatique update du RPi
Source(s) 1.
sudo apt update
sudo apt install unattended-upgrades
Mettre en place la configuration des màj automatiques.
sudo vim /etc/apt/apt.conf.d/50unattended-upgrades
Décommenter les lignes 29 et 30, pour avoir ceci :
"origin=Debian,codename=${distro_codename}-updates";
"origin=Debian,codename=${distro_codename}-proposed-updates";
"origin=Debian,codename=${distro_codename},label=Debian";
"origin=Debian,codename=${distro_codename},label=Debian-Security";
Rendre la màj automatique effective :
sudo dpkg-reconfigure --priority=low unattended-upgrades
Puis confirmer à l'écran.
Il est possible de vérifier que le service fonctionne bien :
sudo systemctl status unattended-upgrades.service
Pi-Hole
Sources d'installation & configuration 1 2.
Préparation
Il faut paramétrer la box pour attribuer une ip fixe au Rpi.
Installation du Pi-Hole
Liens :
curl -sSL https://install.pi-hole.net | bash
Et on répond aux questions.
Ne pas oublier de mettre le server DNS dans la Box Internet, ou de configurer le DHCP.
Voir en toute fin si 4G Box.
Configuration
Changer le mot de passe
pihole -a -p
Blocklist
Exemple de blocklist :
- Fuzz the Pi Guy
- The Firebob
- FireHOL le lien semble dans le github
- blocklists.info – Blocklists for Pihole and Adguard Home
Plusieurs urls peuvent être entrées dans les blocklist en étant séparées par des espaces. Si besoin, utiliser regular expressions 101 ( regex : \t\n pour la sélection) pour faire le tri dans les tabulations et retours de ligne.
Mise à jour de la list Gravity :
sudo pihole -g
Suivant la taille, ça peut mettre du temps.
Test
Sur le site de Fuzz the Pi Guy.
Si ça ne fonctionne pas, d'abord essayer de tout éteindre puis allumer :
- Le Pi-Hole ;
- La Box Internet.
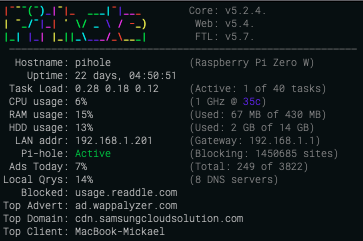
Chronometer
Afin de voir un log en temps réel :
pihole -c
Vérifier les listes
Admettons que l'on souhaite charger les données de WhatsApp, on peut afficher les listes faisant barrière :
pihole -q -adlist -all "whatsapp.net"
On obtient un résultat plus ou moins long suivant les listes ajoutées, voire rien du tout.
Match found in https://raw.githubusercontent.com/hectorm/hmirror/master/data/easyprivacy/list.txt:
g.whatsapp.net.iberostar.com
Match found in https://raw.githubusercontent.com/hectorm/hmirror/master/data/spam404.com/list.txt:
espiawhatsapp.net
newwhatsapp.net
Match found in https://raw.githubusercontent.com/StevenBlack/hosts/master/alternates/porn/hosts:
privatestats.whatsapp.net
Match found in https://raw.githubusercontent.com/mhhakim/pihole-blocklist/master/list.txt:
cdn.whatsapp.net.domain.name
crashlogs.whatsapp.net
dit.whatsapp.net
dit.whatsapp.net.domain.name
e1.whatsapp.net
e10.whatsapp.net
e11.whatsapp.net
[…]
media-arn2-1.cdn.whatsapp.net
media-ber1-1.cdn.whatsapp.net
media-bru2-1.cdn.whatsapp.net
media-cdt1-1.cdn.whatsapp.net
media-dfw5-1.cdn.whatsapp.net
media-frt3-1.cdn.whatsapp.net
media-frt3-2.cdn.whatsapp.net
[…]
Pour avoir les médias, on peut ajouter le regexp suivant :
pihole --white-regex --comment "WhatsApp media" 'media-[a-z0-9\-]*\.cdn\.whatsapp\.net$'
Bonus : Choisir DNS Server sur 4G Box
Par défaut, on ne peut pas voir les paramètres de changement de DNS. Pour afficher l'option, se rendre dans DHCP, puis taper dans la console :
$('#dhcp_dns').css('display', 'block');
Et enfin, entrer l'adresse ip du Pi-Hole.
Installation de DNS Unbound
Installation basée sur la documentation de Pi-hole de unbound, cela permet de mettre en cache les demandes DNS.
Préparatifs
Tout d’abord, on fait une mise à jour :
sudo apt update && sudo apt upgrade -y
Installation de unbound
On vérifie les informations du paquet :
apt show unbound
Il ne s’agit pas de la dernière version, cependant le site officiel conseille de passer par le gestionnaire de paquets plutôt que de le compiler.
Package: unbound
Version: 1.9.0-2+deb10u2
Priority: optional
Section: net
Maintainer: unbound packagers <unbound@packages.debian.org>
Installed-Size: 3,637 kB
Depends: adduser, dns-root-data, lsb-base (>= 3.0-6), openssl, unbound-anchor, libc6 (>= 2.28), libevent-2.1-6 (>= 2.1.8-stable), libfstrm0 (>= 0.2.0), libprotobuf-c1 (>= 1.0.1), libpython3.7 (>= 3.7.0), libssl1.1 (>= 1.1.1), libsystemd0
Suggests: apparmor
Enhances: munin-node
Homepage: https://www.unbound.net/
Download-Size: 671 kB
APT-Sources: http://raspbian.raspberrypi.org/raspbian buster/main armhf Packages
Description: validating, recursive, caching DNS resolver
Unbound is a recursive-only caching DNS server which can perform DNSSEC
validation of results. It implements only a minimal amount of authoritative
service to prevent leakage to the root nameservers: forward lookups for
localhost, reverse for 127.0.0.1 and ::1, and NXDOMAIN for zones served by
AS112. Stub and forward zones are supported.
.
This package contains the unbound daemon.
sudo apt install unbound
Configurer unbound
On crée le fichier /etc/unbound/unbound.conf.d/pi-hole.conf :
sudo vim /etc/unbound/unbound.conf.d/pi-hole.conf
server:
# If no logfile is specified, syslog is used
# logfile: "/var/log/unbound/unbound.log"
verbosity: 0
log-time-ascii: yes
interface: 127.0.0.1
port: 5335
# May be set to yes if you have IPv6 connectivity
do-ip6: no
do-ip4: yes
do-udp: yes
# Use this only when you downloaded the list of primary root servers!
# If you use the default dns-root-data package, unbound will find it automatically
#root-hints: "/var/lib/unbound/root.hints"
# Set number of threads to use
num-threads: 1
# Hide DNS Server info
hide-identity: yes
hide-version: yes
# Limit DNS Fraud and use DNSSEC
harden-glue: yes
harden-dnssec-stripped: yes
harden-referral-path: yes
use-caps-for-id: yes
harden-algo-downgrade: yes
qname-minimisation: yes
# Add an unwanted reply threshold to clean the cache and avoid when possible a DNS Poisoning
unwanted-reply-threshold: 10000000
# Minimum lifetime of cache entries in seconds
cache-min-ttl: 300
# Maximum lifetime of cached entries
cache-max-ttl: 14400
prefetch: yes
prefetch-key: yes
# Optimisations
msg-cache-slabs: 8
rrset-cache-slabs: 8
infra-cache-slabs: 8
key-cache-slabs: 8
# Reduce EDNS reassembly buffer size.
# IP fragmentation is unreliable on the Internet today, and can cause
# transmission failures when large DNS messages are sent via UDP. Even
# when fragmentation does work, it may not be secure; it is theoretically
# possible to spoof parts of a fragmented DNS message, without easy
# detection at the receiving end. Recently, there was an excellent study
# >>> Defragmenting DNS - Determining the optimal maximum UDP response size for DNS <<<
# by Axel Koolhaas, and Tjeerd Slokker (https://indico.dns-oarc.net/event/36/contributions/776/)
# in collaboration with NLnet Labs explored DNS using real world data from the
# the RIPE Atlas probes and the researchers suggested different values for
# IPv4 and IPv6 and in different scenarios. They advise that servers should
# be configured to limit DNS messages sent over UDP to a size that will not
# trigger fragmentation on typical network links. DNS servers can switch
# from UDP to TCP when a DNS response is too big to fit in this limited
# buffer size. This value has also been suggested in DNS Flag Day 2020.
edns-buffer-size: 1232
# increase memory size of the cache
rrset-cache-size: 256m
msg-cache-size: 128m
# increase buffer size so that no messages are lost in traffic spikes
so-rcvbuf: 1m
private-address: 192.168.0.0/16
private-address: 169.254.0.0/16
private-address: 172.16.0.0/12
private-address: 10.0.0.0/8
private-address: fd00::/8
private-address: fe80::/10
Si on force la liste des serveurs de noms de racine (root name server) il faut penser à modifier le fichier de config en conséquence :
wget https://www.internic.net/domain/named.root -qO- | sudo tee /usr/share/dns/root.hints
On redémarre le service :
sudo service unbound restart
Test de la mise en cache du DNS
dig pi-hole.net @127.0.0.1 -p 5335
; <<>> DiG 9.11.5-P4-5.1+deb10u6-Raspbian <<>> pi-hole.net @127.0.0.1 -p 5335
;; global options: +cmd
;; Got answer:
;; ->>HEADER<<- opcode: QUERY, status: NOERROR, id: 19530
;; flags: qr rd ra ad; QUERY: 1, ANSWER: 1, AUTHORITY: 0, ADDITIONAL: 1
;; OPT PSEUDOSECTION:
; EDNS: version: 0, flags:; udp: 1472
;; QUESTION SECTION:
;pi-hole.net. IN A
;; ANSWER SECTION:
pi-hole.net. 300 IN A 3.18.136.52
;; Query time: 856 msec
;; SERVER: 127.0.0.1#5335(127.0.0.1)
;; WHEN: Sun Nov 07 15:06:44 CET 2021
;; MSG SIZE rcvd: 56
Si on recommence la précédente commande :
; <<>> DiG 9.11.5-P4-5.1+deb10u6-Raspbian <<>> pi-hole.net @127.0.0.1 -p 5335
;; global options: +cmd
;; Got answer:
;; ->>HEADER<<- opcode: QUERY, status: NOERROR, id: 63461
;; flags: qr rd ra ad; QUERY: 1, ANSWER: 1, AUTHORITY: 0, ADDITIONAL: 1
;; OPT PSEUDOSECTION:
; EDNS: version: 0, flags:; udp: 1472
;; QUESTION SECTION:
;pi-hole.net. IN A
;; ANSWER SECTION:
pi-hole.net. 283 IN A 3.18.136.52
;; Query time: 0 msec
;; SERVER: 127.0.0.1#5335(127.0.0.1)
;; WHEN: Sun Nov 07 15:07:01 CET 2021
;; MSG SIZE rcvd: 56
On peut surtout remarquer la durée du Query time, on passe de 856 ms à 0 ms.
Test du DNSSEC
Pour se faire, on fait un appel qui doit renvoyer un erreur et un autre qui doit marcher.
dig sigfail.verteiltesysteme.net @127.0.0.1 -p 5335
; <<>> DiG 9.11.5-P4-5.1+deb10u6-Raspbian <<>> sigfail.verteiltesysteme.net @127.0.0.1 -p 5335
;; global options: +cmd
;; Got answer:
;; ->>HEADER<<- opcode: QUERY, status: SERVFAIL, id: 30491
;; flags: qr rd ra; QUERY: 1, ANSWER: 0, AUTHORITY: 0, ADDITIONAL: 1
;; OPT PSEUDOSECTION:
; EDNS: version: 0, flags:; udp: 1472
;; QUESTION SECTION:
;sigfail.verteiltesysteme.net. IN A
;; Query time: 1166 msec
;; SERVER: 127.0.0.1#5335(127.0.0.1)
;; WHEN: Sun Nov 07 15:11:42 CET 2021
;; MSG SIZE rcvd: 57
Le status doit être à SERVFAIL et ne pas fournir d'adresse IP.
dig sigok.verteiltesysteme.net @127.0.0.1 -p 5335
; <<>> DiG 9.11.5-P4-5.1+deb10u6-Raspbian <<>> sigok.verteiltesysteme.net @127.0.0.1 -p 5335
;; global options: +cmd
;; Got answer:
;; ->>HEADER<<- opcode: QUERY, status: NOERROR, id: 51837
;; flags: qr rd ra ad; QUERY: 1, ANSWER: 1, AUTHORITY: 0, ADDITIONAL: 1
;; OPT PSEUDOSECTION:
; EDNS: version: 0, flags:; udp: 1472
;; QUESTION SECTION:
;sigok.verteiltesysteme.net. IN A
;; ANSWER SECTION:
sigok.verteiltesysteme.net. 60 IN A 134.91.78.139
;; Query time: 89 msec
;; SERVER: 127.0.0.1#5335(127.0.0.1)
;; WHEN: Sun Nov 07 15:12:15 CET 2021
;; MSG SIZE rcvd: 71
Le status doit être à NOERRORet fournir une adresse IP.
Configuration du Pi-hole
À la page d’administration du Pi-hole, dans la partie Settings, on désactive tous les serveurs DNS précédemment entrés puis on inscrit l’adresse du localhost suivi du port de unbound (séparé par un #), à savoir 127.0.0.1#5335.
Cloudflared (DoH)
À voir ici.
VPN : WireGuard
La doc est ici.
CentOS 8 minimal installation on RPi 3+ 🇬🇧
Installation
CentOS tuto for installation on RaspberryPi ¹ ².
Just for memory: Fedora link for arm architecture.
SSH
To know ip on local network:
arp -a
Hosts
On the client machine add the server ip address in /etc/hosts.
Add to known hosts
ssh-keyscan mycentos8 >> ~/.ssh/known_hosts
After, edit the file to keep the ecdsa line.
Repo
Install EPEL Repo
dnf info epel-release
dnf install epel-release
Adduser
Adduser
adduser <username>
passwd <username>
Adding user to group wheel:
gpasswd -a <username> wheel
Manage users and groups.
Change shell for zsh
usermod --shell /bin/zsh <username>
Oh-my-zsh
Install Oh-my-zsh:
sh -c "$(curl -fsSL https://raw.githubusercontent.com/ohmyzsh/ohmyzsh/master/tools/install.sh)"
Copy theme 'amuse' to the same folder for '01amuse'
vim ~/.zshrc
ZSH_THEME='01amuse'
Add information to the ligne PROMPT= without delete previous options (more tips here):
vim ~/.oh-my-zsh/themes/01amuse.zsh-theme
PROMPT='[...keep prev...]%{$fg[magenta]%}%n%{$reset_color%} at %{$fg[yellow]%}%m%{$reset_color%}'
Use plugins:
plugins=(git dnf history tmux)
-
dnf
Alias Command Description dnfl dnf listList packages dnfli dnf list installedList installed packages dnfgl dnf grouplistList package groups dnfmc dnf makecacheGenerate metadata cache dnfp dnf infoShow package information dnfs dnf searchSearch package dnfu sudo dnf upgradeUpgrade package dnfi sudo dnf installInstall package dnfgi sudo dnf groupinstallInstall package group dnfr sudo dnf removeRemove package dnfgr sudo dnf groupremoveRemove package group dnfc sudo dnf clean allClean cache - git
-
history
Alias Command Description hhistoryPrints your command history hshistory | grepUse grep to search your command history hsihistory | grep -iUse grep to do a case-insensitive search of your command history - vscode
- npm
-
tmux
Alias Command Description tatmux attach -t Attach new tmux session to already running named session tadtmux attach -d -t Detach named tmux session tstmux new-session -s Create a new named tmux session tltmux list-sessions Displays a list of running tmux sessions tksvtmux kill-server Terminate all running tmux sessions tksstmux kill-session -t Terminate named running tmux session tmux_zsh_tmux_plugin_runStart a new tmux session -
nmap
Alias Description nmap_open_portsscan for open ports on target nmap_list_interfaceslist all network interfaces on host where the command runs nmap_slowslow scan that avoids to spam the targets logs nmap_finscan to see if hosts are up with TCP FIN scan nmap_fullaggressive full scan that scans all ports, tries to determine OS and service versions nmap_check_for_firewallTCP ACK scan to check for firewall existence nmap_ping_through_firewallhost discovery with SYN and ACK probes instead of just pings to avoid firewall restrictions nmap_fastfast scan of the top 300 popular ports nmap_detect_versionsdetects versions of services and OS, runs on all ports nmap_check_for_vulnsuses vulscan script to check target services for vulnerabilities nmap_full_udpsame as full but via UDP nmap_traceroutetry to traceroute using the most common ports nmap_full_with_scriptssame as nmap_full but also runs all the scripts nmap_web_safe_osscanlittle "safer" scan for OS version as connecting to only HTTP and HTTPS ports doesn't look so attacking nmap_ping_scanICMP scan for active hosts
Note : elements in zsh arrays are separated by spaces.
Do not use commas.
Execute sudo without Password
Link here.
You can configure sudo to never ask for your password.
Open a Terminal window and type:
sudo visudo
In the bottom of the file, add the following line:
$USER ALL=(ALL) NOPASSWD: ALL
Where $USER is your username on your system.
Or, in my case, uncomment :
## Allows people in group wheel to run all commands
%wheel ALL=(ALL) ALL
SSH keys
First create a ssh rsa key on computer:
ssh-keygen -t rsa
Then :
ssh myuser@server.com mkdir .sshscp ~/.ssh/id_rsa.pub myuser@server.com:.ssh/authorized_keys
GitHub
Use SSH keys
First, check if existing SSH keys are present:
ls -al ~/.ssh
Generate key pair:
ssh-keygen -t rsa -b 4096 -C "your_email@example.com"
Start the SSH agent in background:
eval "$(ssh-agent -s)"
Add the SSH private key to the ssh-agent:
ssh-add ~/.ssh/id_rsa
Copy the public key to the clipboard and paste it in Github.
To test the connection:
ssh -T git@github.com
Personnalize motd
Edit motd file:
vim /etc/motd
For ASCII check this site.
Or, much better, create motd.sh in /etc/profile.d/ with:
#!/bin/sh
#
printf "\n"
printf " ┌┬┐┬ ┬╔═╗┌─┐┌┐┌┌┬┐╔═╗╔═╗\n"
printf " │││└┬┘║ ├┤ │││ │ ║ ║╚═╗\n"
printf " ┴ ┴ ┴ ╚═╝└─┘┘└┘ ┴ ╚═╝╚═╝\n"
printf " ╔╦╗┬┌─┐┬┌─┌─┐┌─┐┬\n"
printf " ║║║││ ├┴┐├─┤├┤ │\n"
printf " ╩ ╩┴└─┘┴ ┴┴ ┴└─┘┴─┘\n"
printf "\n"
printf "\t- %s\n\t- Kernel %s\n" "$(cat /etc/redhat-release)" "$(uname -r)"
printf "\n"
date=`date`
load=`cat /proc/loadavg | awk '{print $1}'`
root_usage=`df -h / | awk '/\// {print $(NF-1)}'`
memory_usage=`free -m | awk '/Mem:/ { total=$2 } /buffers\/cache/ { used=$3 } END { printf("%3.1f%%", used/total*100)}'`
swap_usage=`free -m | awk '/Swap/ { printf("%3.1f%%", "exit !$2;$3/$2*100") }'`
users=`users | wc -w`
time=`uptime | grep -ohe 'up .*' | sed 's/,/\ hours/g' | awk '{ printf $2" "$3 }'`
processes=`ps aux | wc -l`
ethup=$(ip -4 ad | grep 'state UP' | awk -F ":" '!/^[0-9]*: ?lo/ {print $2}')
ip=$(ip ad show dev $ethup |grep -v inet6 | grep inet|awk '{print $2}')
echo "System information as of: $date"
echo
printf "System load:\t%s\tIP Address:\t%s\n" $load $ip
printf "Memory usage:\t%s\tSystem uptime:\t%s\n" $memory_usage "$time"
printf "Usage on /:\t%s\tSwap usage:\t%s\n" $root_usage $swap_usage
printf "Local Users:\t%s\tProcesses:\t%s\n" $users $processes
echo
[ -f /etc/motd.tail ] && cat /etc/motd.tail || true
(Idea from here.)
Vim
Config
File .vimrc:
# choose theme color
colo desert
# enable syntax highlighting
syntax on
# set mouse
set mouse=a
# you can show line numbers
set number
# show the editing mode on the last line
set showmode
# tell vim to keep a backup file
set backup
# tell vim where to put its backup files but the file must be created
set backupdir=~/.vim_backup/
# tell vim where to put swap files
# set dir=/private/tmp
# i don't use autoindent, but here's how to configure it:
# set autoindent
# highlight matching search strings
# set hlsearch
# make searches case insensitive
# set ignorecase
Plugins
Vim-powerline
sudo dnf install vim-powerline
Tmux
Installation
Tmux is a Terminal Multiplexer. It enables a number of terminals to be created, accessed and controlled from a single screen.
Install with dnfi tmux -y to get version 1.8, but there isn't plugins available... so, see next!
Build Tmux
First, install C compiler:
sudo dnf install -y gcc
Build Libevent
Libevent source releases.
wget https://github.com/libevent/libevent/releases/download/release-2.1.8-stable/libevent-2.1.8-stable.tar.gz
tar zxvf libevent-*.tar.gz
cd libevent-2.1.8-stable
mkdir -p $HOME/.local
./configure --prefix="$HOME/.local"
make -j && make install
Build Ncurses
Ncurses source releases.
wget http://ftp.gnu.org/pub/gnu/ncurses/ncurses-6.1.tar.gz
tar zxvf ncurses-6.1.tar.gz
cd ncurses-6.1
./configure --prefix="$HOME/.local"
make -j && make install
Build Tmux
Tmux source releases.
wget https://github.com/tmux/tmux/releases/download/2.8/tmux-2.8.tar.gz
tar zxvf tmux-2.8.tar.gz
cd tmux-2.8
./configure --prefix=$HOME/.local \
> CPPFLAGS="-I$HOME/.local/include -I$HOME/.local/include/ncurses" \
> LDFLAGS="-L$HOME/.local/lib"
make -j && make install
export PATH=$HOME/.local/bin:$PATH
export LD_LIBRARY_PATH=/home/mickael/.local/lib
To make folders persistent:
echo 'export PATH=$HOME/.local/bin:$PATH' >> ~/.zshrc
echo 'export LD_LIBRARY_PATH=$HOME/.local/lib' >> ~/.zshrc
Chech with :
$PATH
env | grep '^LD_LIBRARY_PATH'
Configuration
First param
Edit an other configuration file:
vim ~/.tmux.conf
Here an example of config's file.
And write:
# C-b is not acceptable -- Vim uses it
set-option -g prefix C-a
bind C-a last-window
# windows starts at 1
set -g base-index 1
set -g pane-base-index 1
# display messages for a second
set -g display-time 2500
# List of plugins
#set -g @plugin 'tmux-plugins/tpm'
#set -g @plugin 'tmux-plugins/tmux-sensible'
# Mouse support - set to on if you want to use the mouse
set -g mode-mouse on
# Toggle mouse mode to allow mouse copy/paste
# set mouse on with prefix m
bind m \
set -g mouse on \; \
display-message "Mouse: ON"
# set mouse off with prefix M
bind M \
set -g mouse off \; \
display-message "Mouse: OFF"
# bind reload
bind r source-file ~/.tmux.conf
# Use Vi mode
set -g mode-keys vi
# Other examples:
# set -g @plugin 'github_username/plugin_name'
# set -g @plugin 'git@github.com/user/plugin'
# set -g @plugin 'git@bitbucket.com/user/plugin'
# Initialize TMUX plugin manager (keep this line at the very bottom of tmux.conf)
#run -b '~/.tmux/plugins/tpm/tpm'
It gives access to vim keys:
| Function | vi | Function | vi | |
|---|---|---|---|---|
| Back to indentation | ^ | Half page up | C-u | |
| Clear selection | Escape | Next page | C-f | |
| Copy selection | Enter | Next word | w | |
| Cursor down | j | Paste buffer | p | |
| Cursor left | h | Previous page | C-b | |
| Cursor right | l | Previous word | b | |
| Cursor to bottom line | L | Quit mode | q | |
| Cursor to middle line | M | Scroll down | C-Down or J | |
| Cursor to top line | H | Scroll up | C-Up or K | |
| Cursor up | k | Search again | n | |
| Delete entire line | d | Search backward | ? | |
| Delete to end of line | D | Search forward | / | |
| End of line | $ | Start of line | 0 | |
| Goto line | : | Start selection | Space | |
| Half page down | C-d |
Second param
Edit the tmux.plugin.zsh.
vim ~/.oh-my-zsh/plugins/tmux/tmux.plugin.zsh
Set autostart:
# Automatically start tmux
: ${ZSH_TMUX_AUTOSTART:=true}
Full:
if ! (( $+commands[tmux] )); then
print "zsh tmux plugin: tmux not found. Please install tmux before using this plugin." >&2
return 1
fi
# ALIASES
alias ta='tmux attach -t'
alias tad='tmux attach -d -t'
alias ts='tmux new-session -s'
alias tl='tmux list-sessions'
alias tksv='tmux kill-server'
alias tkss='tmux kill-session -t'
# CONFIGURATION VARIABLES
# Automatically start tmux
: ${ZSH_TMUX_AUTOSTART:=true}
# Only autostart once. If set to false, tmux will attempt to
# autostart every time your zsh configs are reloaded.
: ${ZSH_TMUX_AUTOSTART_ONCE:=true}
# Automatically connect to a previous session if it exists
: ${ZSH_TMUX_AUTOCONNECT:=true}
# Automatically close the terminal when tmux exits
#: ${ZSH_TMUX_AUTOQUIT:=$ZSH_TMUX_AUTOSTART}
: ${ZSH_TMUX_AUTOQUIT:=false}
# Set term to screen or screen-256color based on current terminal support
: ${ZSH_TMUX_FIXTERM:=true}
# Set '-CC' option for iTerm2 tmux integration
: ${ZSH_TMUX_ITERM2:=false}
# The TERM to use for non-256 color terminals.
# Tmux states this should be screen, but you may need to change it on
# systems without the proper terminfo
: ${ZSH_TMUX_FIXTERM_WITHOUT_256COLOR:=screen}
# The TERM to use for 256 color terminals.
# Tmux states this should be screen-256color, but you may need to change it on
# systems without the proper terminfo
: ${ZSH_TMUX_FIXTERM_WITH_256COLOR:=screen-256color}
# Set the configuration path
: ${ZSH_TMUX_CONFIG:=$HOME/.tmux.conf}
# Set -u option to support unicode
: ${ZSH_TMUX_UNICODE:=false}
# Determine if the terminal supports 256 colors
if [[ $terminfo[colors] == 256 ]]; then
export ZSH_TMUX_TERM=$ZSH_TMUX_FIXTERM_WITH_256COLOR
else
export ZSH_TMUX_TERM=$ZSH_TMUX_FIXTERM_WITHOUT_256COLOR
fi
# Set the correct local config file to use.
if [[ "$ZSH_TMUX_ITERM2" == "false" && -e "$ZSH_TMUX_CONFIG" ]]; then
export ZSH_TMUX_CONFIG
export _ZSH_TMUX_FIXED_CONFIG="${0:h:a}/tmux.extra.conf"
else
export _ZSH_TMUX_FIXED_CONFIG="${0:h:a}/tmux.only.conf"
fi
# Wrapper function for tmux.
function _zsh_tmux_plugin_run() {
if [[ -n "$@" ]]; then
command tmux "$@"
return $?
fi
local -a tmux_cmd
tmux_cmd=(command tmux)
[[ "$ZSH_TMUX_ITERM2" == "true" ]] && tmux_cmd+=(-CC)
[[ "$ZSH_TMUX_UNICODE" == "true" ]] && tmux_cmd+=(-u)
# Try to connect to an existing session.
[[ "$ZSH_TMUX_AUTOCONNECT" == "true" ]] && $tmux_cmd attach
# If failed, just run tmux, fixing the TERM variable if requested.
if [[ $? -ne 0 ]]; then
if [[ "$ZSH_TMUX_FIXTERM" == "true" ]]; then
tmux_cmd+=(-f "$_ZSH_TMUX_FIXED_CONFIG")
elif [[ -e "$ZSH_TMUX_CONFIG" ]]; then
tmux_cmd+=(-f "$ZSH_TMUX_CONFIG")
fi
$tmux_cmd new-session
fi
if [[ "$ZSH_TMUX_AUTOQUIT" == "true" ]]; then
exit
fi
}
# Use the completions for tmux for our function
compdef _tmux _zsh_tmux_plugin_run
# Alias tmux to our wrapper function.
alias tmux=_zsh_tmux_plugin_run
# Autostart if not already in tmux and enabled.
if [[ -z "$TMUX" && "$ZSH_TMUX_AUTOSTART" == "true" && -z "$INSIDE_EMACS" && -z "$EMACS" && -z "$VIM" ]]; then
# Actually don't autostart if we already did and multiple autostarts are disabled.
if [[ "$ZSH_TMUX_AUTOSTART_ONCE" == "false" || "$ZSH_TMUX_AUTOSTARTED" != "true" ]]; then
export ZSH_TMUX_AUTOSTARTED=true
_zsh_tmux_plugin_run
fi
fi
Plugins
-
Tpm is a plugin manager:
-
prefix+Ito install new plugin. -
prefix+Uto update plugins. -
prefix+altuto remove/uninstall plugins not on the plugin list.
-
-
Tmux-resurrect to save & restore session after reboot:
-
prefix+Ctrlsto save. -
prefix+Ctrlrto restore.
-
- Tmux-yank to copy to system clipboard (need configuration steps).
-
Tmux-copycat enable regex search with
prefix+/:-
prefix+ctrlf: simple file search. -
prefix+ctrlg: jumping over git status files (best used after git status command). -
prefix+alth: jumping over SHA-1/SHA-256 hashes (best used after git log command). -
prefix+ctrlu: url search (http, ftp and git urls). -
prefix+ctrld: number search (mnemonic d, as digit). -
prefix+alti: ip address search.
-
-
Themes pack.
- To unable theme packs like powerline, you need to install powerline fonts on ssh machine as well (here) and change font for a powerline font in the terminal preferencies.
Various app
- Links : Web browser running in both graphics and text mode
sudo dnf install -y links. - Tree : Tree structure for folders
sudo dnf install -y tree(tips).
Security
SSH Key authentication
From Nicolas Kovacs from microlinux.fr.
From host machin (it takes a while):
ssh-keygen -t rsa -b 16384
> Generating public/private rsa key pair.
> Enter file in which to save the key (/Users/mickael/.ssh/id_rsa):
> Enter passphrase (empty for no passphrase):
> Enter same passphrase again:
> Your identification has been saved in /Users/mickael/.ssh/id_rsa.
> Your public key has been saved in /Users/mickael/.ssh/id_rsa.pub.
> The key fingerprint is: [...]
Send public key to the distant server:
ssh-copy-id -i .ssh/id_rsa.pub mycentos
> /usr/bin/ssh-copy-id: INFO: Source of key(s) to be installed: ".ssh/id_rsa.pub"
> /usr/bin/ssh-copy-id: INFO: attempting to log in with the new key(s), to filter out any that are already installed
> /usr/bin/ssh-copy-id: INFO: 1 key(s) remain to be installed -- if you are prompted now it is to install the new keys
> <username>@mycentos's password:
> Number of key(s) added: 1
> Now try logging into the machine, with: "ssh 'mycentos'" and check to make sure that only the key(s) you wanted were added.
Connect and check:
ssh mycentos
> Last login: Tue Apr 28 14:01:03 2020 from 192.168.1.198
cat ~/.ssh/authorized_keys
GPG Keys
Check gpg keys:
gpg --list-keys
Create:
gpg --gen-key
Re-check.
# For export
gpg --output <name>.gpg --export <UID>
# For ASCII format
gpg --armor --export <UID>
Edit ~/.zshrc and add:
# Fix gpg passphrase
export GPG_TTY=$(tty)
To test:
echo "test" | gpg2 --clearsign
Packages
Packages search for Linux & Unix.
Nmap
Nmap is one of the most popular tools for network mapping. You can discover active hosts within a network, and a wide range of other detection features. Nmap has functions for host discovery, port scanning, OS detection, app versions, and other scripting interactions.
sudo dnf install -y nmap
Others
- Kismet Wireless
- John the Ripper
- THC Hydra
- Metasploit Framework
- OpenVAS
Configuration
- FirewallD sur un serveur LAN by MicroLinux 🇫🇷.
- FirewallD sur un serveur dédié by MicroLinux 🇫🇷.
- Bloquer les attaques par force brute avec Fail2ban sous CentOS 7 by MicroLinux 🇫🇷.
Check
For check open ports and write it in a file:
mkdir tmp
nmap -p 0-65535 portquiz.net > tmp/nmaptest
grep filtered tmp/nmaptest
Git
Config
Git tools - signing your work
git config --global user.email <user@exemple.com>
git config --global user.name <Username>
git config --global user.signingkey = <UID>
git config --global color.ui = always
git config --global color.branch = always
git config --global color.diff = always
git config --global color.interactive = always
git config --global color.status = always
git config --global push.default = simple
git config --global gpg.program = gpg2
git config --global commit.gpgSign = true
To get in .gitconfig:
[user]
email = <user@exemple.com>
name = <Username>
signingkey = <signingkey>
[color]
ui = always
branch = always
diff = always
interactive = always
status = always
[push]
default = simple
[gpg]
program = gpg2
[commit]
gpgSign = true
Tips
Zsh
- Official site.
- Find all files in
paththat containtext:sudo grep -Rnil 'text' path. - 75 dnf commands, tips & plugins.
- Fonction used for ignore tmux.plugin.zsh:
var="$HOME/.oh-my-zsh" ; find "$var" | while read -r line; do echo "$var/$line"; done >> ~/.gitignore
- Add timestamp to a file:
h >> "~/list-$(date '+%s').txt"
- Test script with ShellCheck.
- Make dir and cd it:
mkdir "<folder>" && cd "$_"
- Or paste following lines in
.zshrcand refresh after:
mkcdir ()
{
mkdir -p -- "$1" &&
cd -P -- "$1"
}
Dnf
- Dnf doc.
- 25 useful dnf command examples.
- How to install and remove packages with DNF in Fedora.
- Dnf, le gestionnaire de paquets de Fedora 🇫🇷.
Tmux
- Shortcuts & cheatsheet.
- Cheat sheet 1.
- Cheat sheet 2.
- Cheat sheet 3.
- Manual.
- Help :
Ctrlb+?(orCtrla+?in my case).
Git
- Git tutorial.
- Git tutorial from Bitbucket.
- Devenez un expert de git.
- List files not add and not in .ignore file :
git ls-files -o --exclude-standard | cut -d/ -f1 | uniq. -
Add user sign key:
git config --global user.signingkey <gpg-key-id>. - Sign a commit :
git commit -a -S -m 'commit signé'.
Vim
- Vim The editor original tips.
- Cheat sheet.
- Save sudo without root permission:
:w! sudo tee %. - Delete tips.
- Comment lines 66 to 70:
:66,70s/^/# - To yank all the lines and copy to the clipboard :
:% y +or:g g " + y G. -
Clear the last search:
:let @/ = ""ornoh. - Search & Replace.
- Vim Tips form Alvin Alexander.
pip
- Upgrade pip:
pip install --upgrade pip
Various
- Check if a package if present
rpm -qa | grep -i packageName. -
Use
history. - Interactive search :
Ctrlr. - How to install an RPM package into a different directory in CentOS/RHEL/Fedora.
- Special-use IPv4 addresses.
- To know its ip address:
host myip.opendns.com resolver1.opendns.com. - Remove user and every trace.
- Tar command with examples.
- Bash reference manual.
- Command not found.
Various
Sources
- MicroLinux 🇫🇷.
- It-Connect.fr 🇫🇷.
- Pwet/man/linux 🇫🇷.
- IP addresses tools.
- Linux help.
- PhoenixNAP.
- GPG with LinuxPedia.
Go further
- How to set up your own private Git server on Linux.
- RaspberryPi OwnCloud.
- RaspberryPi projetcs.
- Installer un serveur de réseau local & Make a samba server on RHEL 7.
- How to cross-compile
Todo
Self host your web meetings with Jitsi and Raspberry Pi
Source: https://peppe8o.com/self-host-your-web-meetings-with-jitsi-and-raspberry-pi/
Author: peppe8o
Self host your web meetings with Jitsi and Raspberry PI
Excerpt
Even if already used with smartphones, video meetings overwhelmingly raised with Covid pandemic. Between solutions discovered in this context, a great open sour
Even if already used with smartphones, video meetings overwhelmingly raised with Covid pandemic. Between solutions discovered in this context, a great open source and web application to host your video meetings, Jitsi, can run on Raspberry PI
In this tutorial I’m going to show you how to install a Jitsi meet server in your Raspberry PI computer board.
Beside having an online free service, Jitsi can transform your RPI into a web meeting server able to connect you with your parents and friends both from a web browser as from client applications available from quite all app stores.
![]()
Jitsi is a set of open source projects that allows you to easily build and deploy secure video conferencing solutions. At the heart of Jitsi are Jitsi Videobridge and Jitsi Meet, which let you have conferences on the internet, while other projects in the community enable other features such as audio, dial-in, recording, and simulcasting.
Ref.: Jitsi official website, About page
What is interesting in Jitsi is its ease setup of a meeting: you just type the meeting name and share its URL, having your friends directly accessing to your conference.
I have to admit that it took to me a few days to setup a Jitsi server. This because you can install also from a 32-bit system with no errors, but you will get a frustrating and repeating “Unfortunately something went wrong. We are trying to fix this. Reconnecting in xx seconds” error with no apparent reason. The solution was installing a 64-bit OS (also available from Raspberry PI Foundation.
If you want to use your meeting server over the internet, you will need a public IP address. More info can be found in my How to configure No-IP DUC service in your Raspberry PI tutorial. Here you can also learn how to get a free domain to use instead of a simple IP address (in this tutorial I will use “myhomepi.webhop.me” example domain). If you can’t get a public IP, your meeting server will only work inside your local network, using IP address instead of domain name for setup.
Following port forwarding rules will be also required in your router:
- 80/tcp
- 443/tcp
- 10000/udp
- 3478/udp
- 5349/tcp
Raspberry PI OS doesn’t come with an internal firewall, so you don’t need to create ufw access rules. Jitsi docs also list 22/tcp port, but this is for your ssh access and you shouldn’t forward this port to internet.
Final note, Jitsi uses a lot of RAM. Raspberry PI 3 boards hardly will be able to run jitsi, but from Raspberry PI 4 computer models you can get a 4GB RAM (or more) versions able to support your web conferences.
For this tutorial I’m going to use a Raspberry PI 4 Model B (4GB RAM version).
Step-by-Step Procedure
Prepare Operating System
As Jitsi requires computing resources, I suggest to use the Lite version of Raspberry PI OS. This allows a headless and performing OS.
Get your 64-bit RaspiOS image, dowloading it from https://downloads.raspberrypi.org/raspios_lite_arm64/images/ official repository. You can download latest version in “zip” file, as common flashing software can manage these compressed files.
Flash this OS to your SD card with my tutorial to install Raspberry PI OS Lite.
Make your OS up to date. From terminal, use following command:
sudo apt update -y && sudo apt upgrade -y
Create Port Forwarding Rules in your Router
At this stage, you have your Raspberry PI’s local IP address. It’s time to configure port forwarding rules in your router. Ports used are the following:
- 80/tcp
- 443/tcp
- 10000/udp
- 3478/udp
- 5349/tcp
This procedure changes depending on your router brand and model. For example, in my ASUS router I set them into “WAN” -> “Virtual Server / Port Forwarding” menù, adding the following list (where 192.168.1.133 is my local Raspberry PI’s IP address):

Install Jitsi
Install required packages. From terminal:
sudo apt install gnupg2 nginx
apt-transport-https
We’ll use an internet domain (myhomepi.webhop.me), so we have to make our RPI aware of its external name (If you are going to use a direct IP address, you can skip this part). Remeber to use your domain instead of mine:
sudo hostnamectl set-hostname myhomepi.webhop.me
Also add your domain resolution in your hosts file:
sudo nano /etc/hosts
append a row with your public IP address and domain name, like in following picture (I’ve covered with yellow my public IP):

Add the jitsi repository to your apt sources. This makes Jitsi Meet packages available directly from apt. Please note that following commands will be blaced each one into a single terminal line:
curl https://download.jitsi.org/jitsi-key.gpg.key | sudo sh -c 'gpg --dearmor > /usr/share/keyrings/jitsi-keyring.gpg'
echo 'deb [signed-by=/usr/share/keyrings/jitsi-keyring.gpg] https://download.jitsi.org stable/' | sudo tee /etc/apt/sources.list.d/jitsi-stable.list > /dev/null
Update apt:
sudo apt update
And finally run jitsi installation:
sudo apt install jitsi-meet
This setup will download all software needed and will require only 2 confirmations.
First dialog screen requests hostname where Jitsi will listen. Use your internet domain or your Raspberry PI’s IP address (if you are going to install without a domain name):

The second dialog screen will require if you already own a certificate to expose jitsi from https instead of an insecure http. Use first option, as we’ll install a certbot certificate in very next step:

When installation is finished, use following command to get your https certificate. Remember to answer with a valid email address (when requested) to make it working:
sudo /usr/share/jitsi-meet/scripts/install-letsencrypt-cert.sh
Use Jitsi Meet
You are now ready to connect from a client browser (maybe a smartphone or a computer) to your personal Jitsi meet server by using your domain address:

From here you can fill a name for your meeting in text box and click “start meeting button”. This will redirect to a meeting room that you can share with your friends by sending them the resulting room url.
Please note that in Jitsi community there is reported a known issue with Firefox browsers not having remote video/audio. Jitsi staff suggest to use Chrome browser instead.
Enjoy!
Common Issues/Errors
Last section of this tutorial regards some problems I had to fight in these days with Jitsi. Please note that these errors where all solved by using a 64-bit distribution instead of default 32-bit one.
Getting Certificates Failed
With 32-bit OS the install-letsencrypt-cert.sh script will fail with following error:
nginx: [emerg] "server_names_hash_bucket_size" directive is duplicate in /etc/nginx/sites-enabled/myhomepi.webhop.me.conf:1
Cleaning up challenges
nginx restart failed:
This failure can be passed by commenting “server_names_hash_bucket_size 64” in “/etc/nginx/sites-enabled/myhomepi.webhop.me.conf” (change myhomepi.webhop.me with your own domain name) and using classic let’s encrypt installation procedure for Nginx:
sudo apt install certbot python-certbot-nginx
sudo certbot --nginx
“Unfortunately something went wrong” Browser Error
Again, this is caused by 32-bit OS and moving to 64-bit distribution will solve. Some users with older Jitsi versions solved with following steps.
Check that 10000/UDP and 443/TCP port are correctly forwarded in your router.
Edit “sip-communicator.properties” file:
sudo nano /etc/jitsi/videobridge/sip-communicator.properties
Appending following:
org.ice4j.ice.harvest.NAT_HARVESTER_LOCAL_ADDRESS=put here your local ip address
org.ice4j.ice.harvest.NAT_HARVESTER_PUBLIC_ADDRESS=put here your public ip address
Restart Jitsi services:
sudo systemctl restart prosody.service jicofo.service jitsi-videobridge2.service